

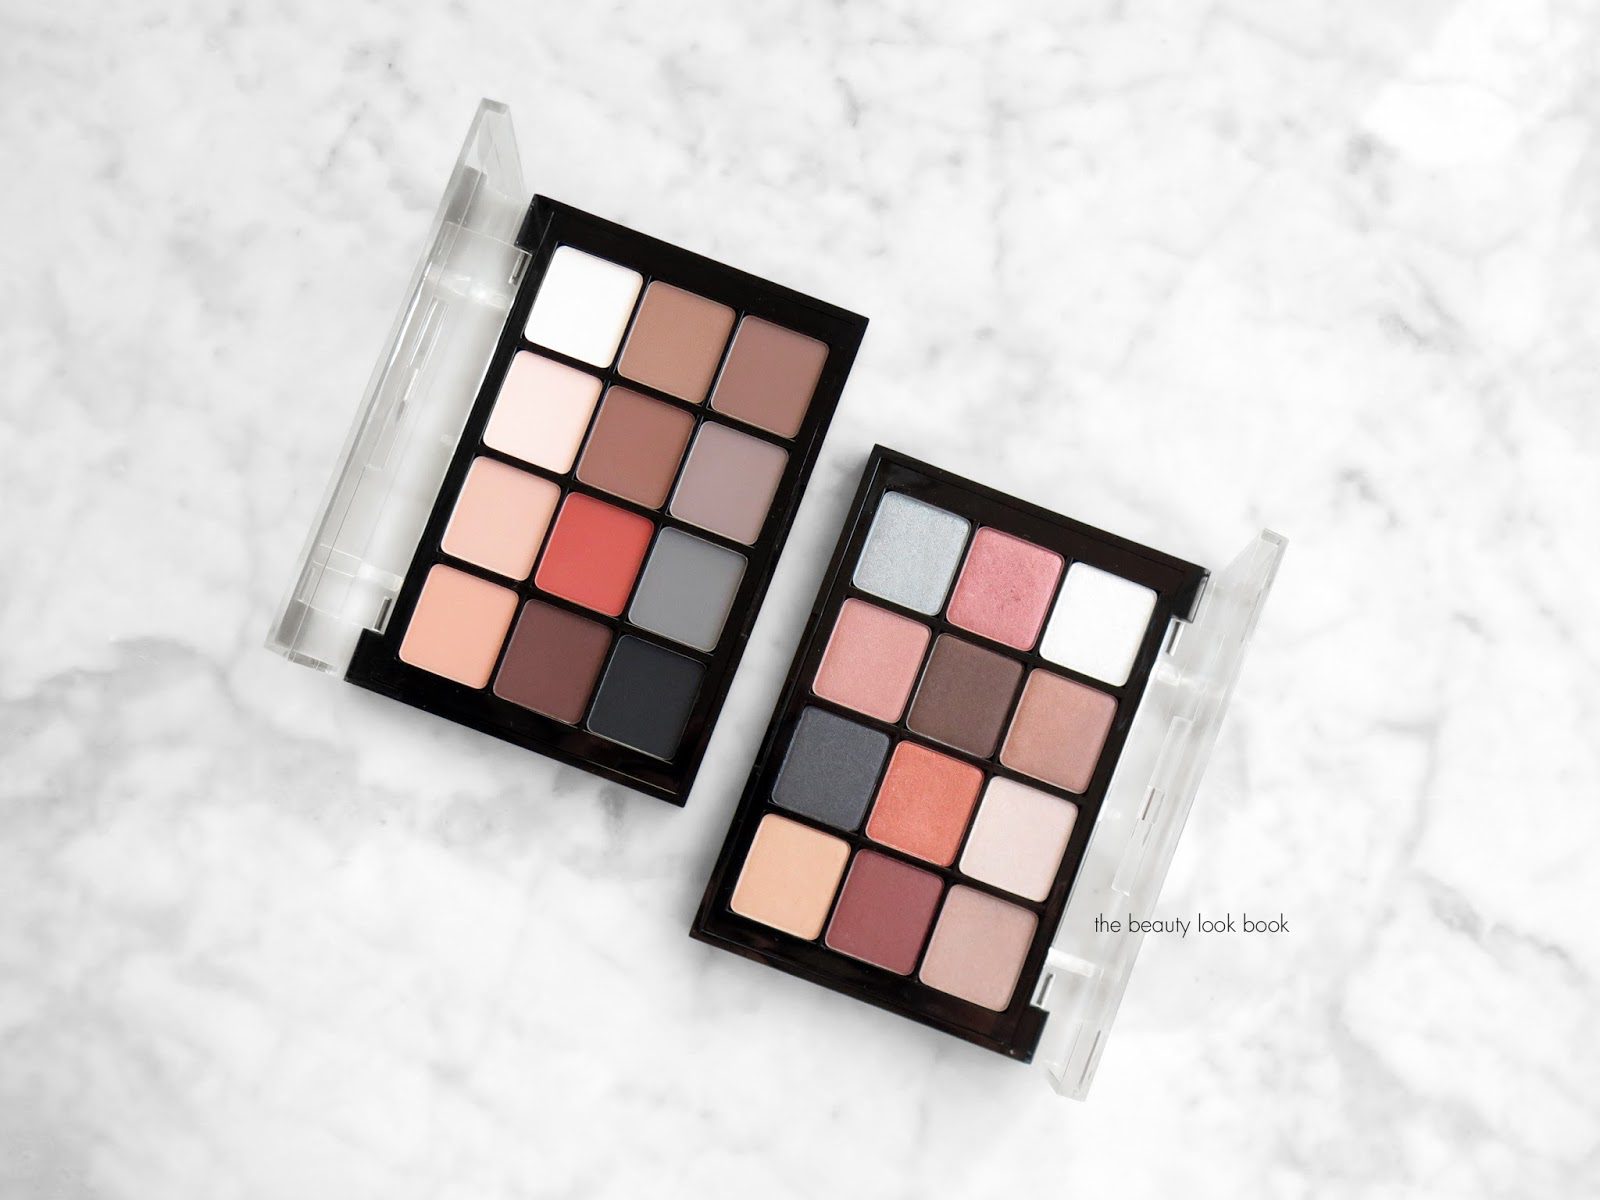
I was over the moon when I found out Anastasia Beverly Hills expanded their product line to Sephora and immediately picked up a few eyeshadows. In store the first weeks they launched I saw a lot of testers but there were empty spots for product as stock was trickling in. I picked out a few shades in batches and the process of narrowing down picks was overwhelming because there are so many options! Shades went in and out of my online cart and I finally decided on 12. You can buy the Eyeshadow Singles for $12 each and the 4-Pan Empty Well Palette for $1. There are different textures ranging from matte, metallic, shimmer, satin and glitter. I picked out a mix of finishes to give them a test.

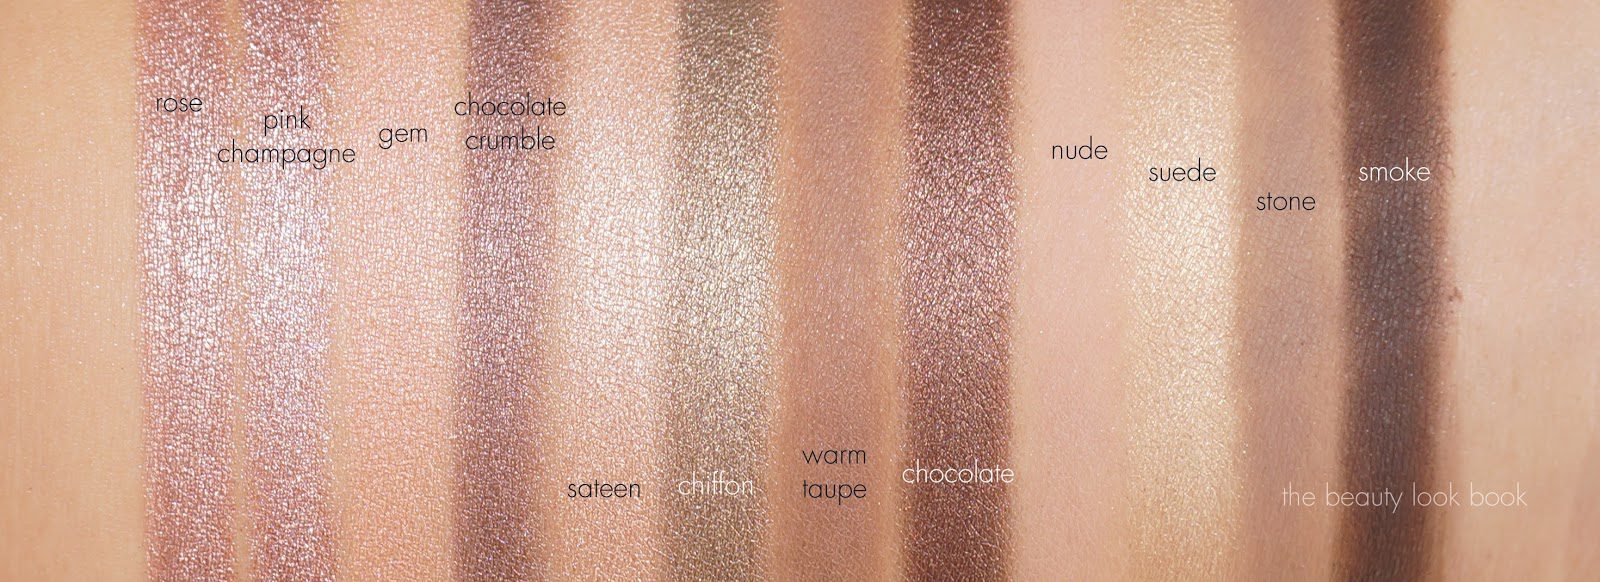
The colors I picked out vary in weight depending on finish. All the pans are the same size but some are more densely packed while the shimmers have lighter weight particles mixed in. I’ll list the weights per shade in case you’re interested. Pigment is very impressive across all the ones I bought. Perhaps I was lucky in selecting good shades – most I ordered sight unseen. Based on online swatches I was a bit concerned some of the colors such as Rose or Pink Champagne would be extremely glittery or frosted. You can apply some of them with a damp brush for an extremely pigmented almost foiled-looking finish for more intense coverage. With a dry brush over an eyeshadow base the finish is more natural looking.
Finish is smooth and easy to blend. All the colors applied on the lids flawlessly – they have a soft texture that is very easy to layer. Some of the shimmer colors will have fall out when you apply them – but once on the lids they did stay put all day long without budging. I have hundreds of eyeshadows from other brands and do not need any more but being a beauty blogger am always curious about testing new formulas, brands and textures. I did not know what to expect from these – I thought there might be a good chance these were overhyped, but after putting these to the test I can say that these are definitely impressive. The pigment is very good, textures easy to blend and color selection seems to be diverse to suit a wide range of preferences.
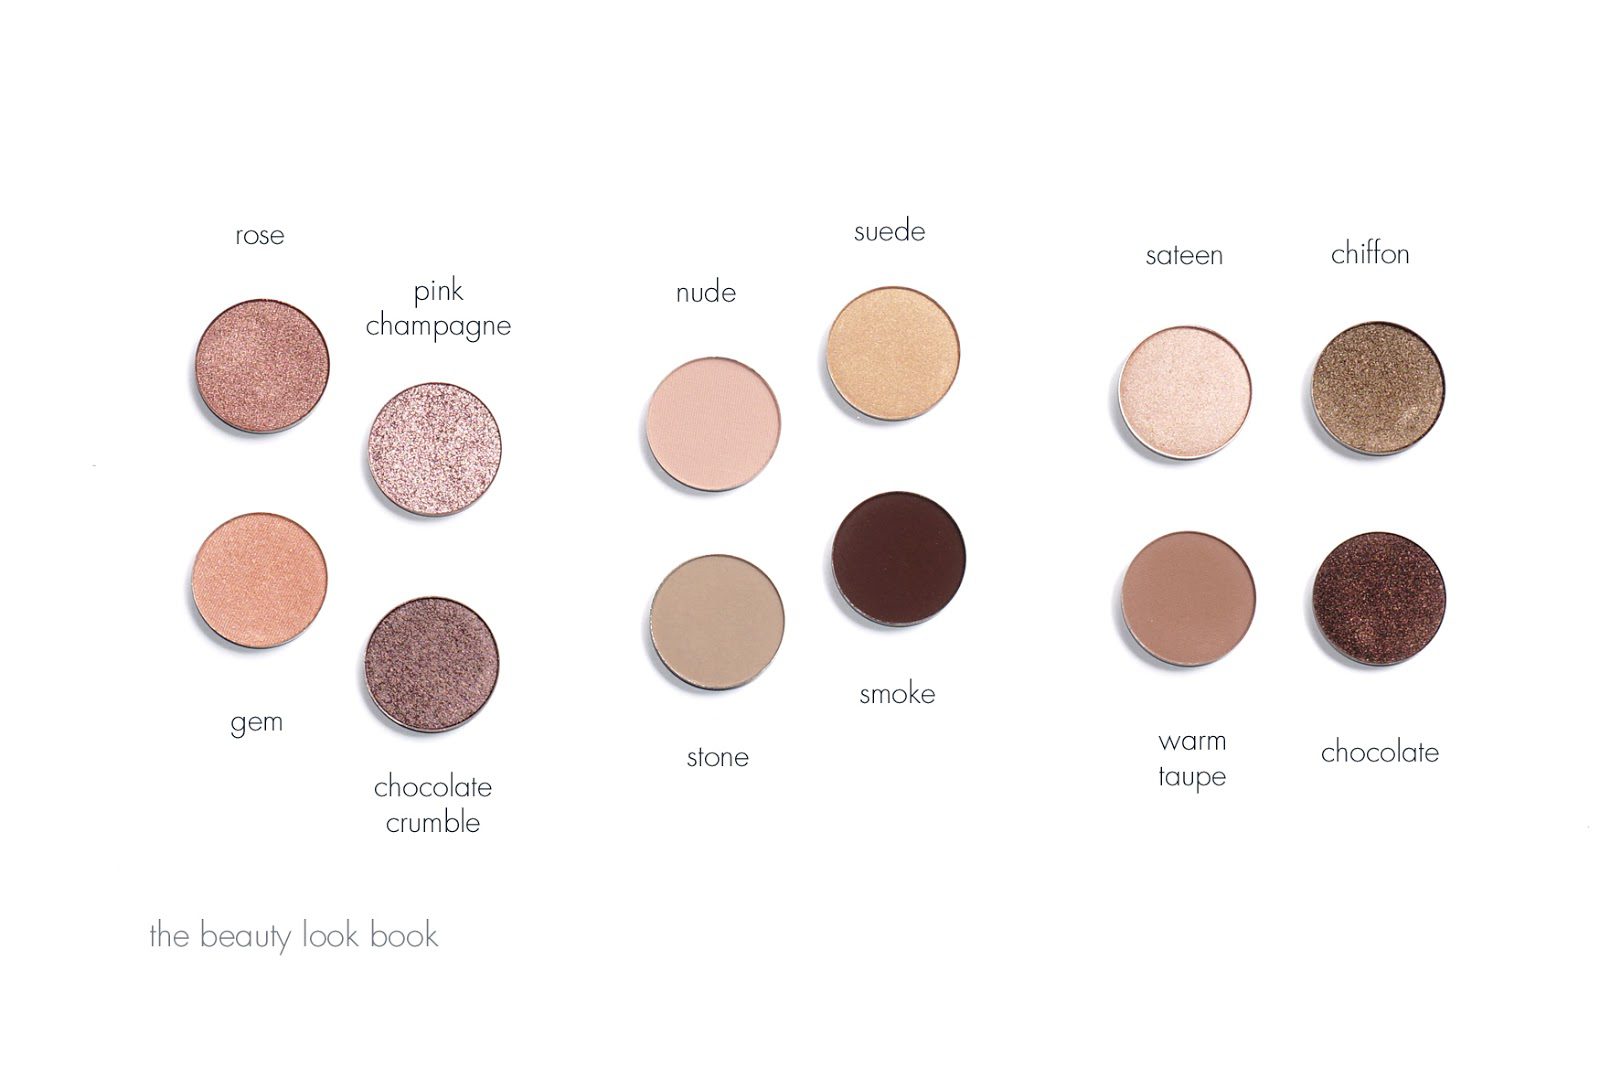
Shades that I picked out:
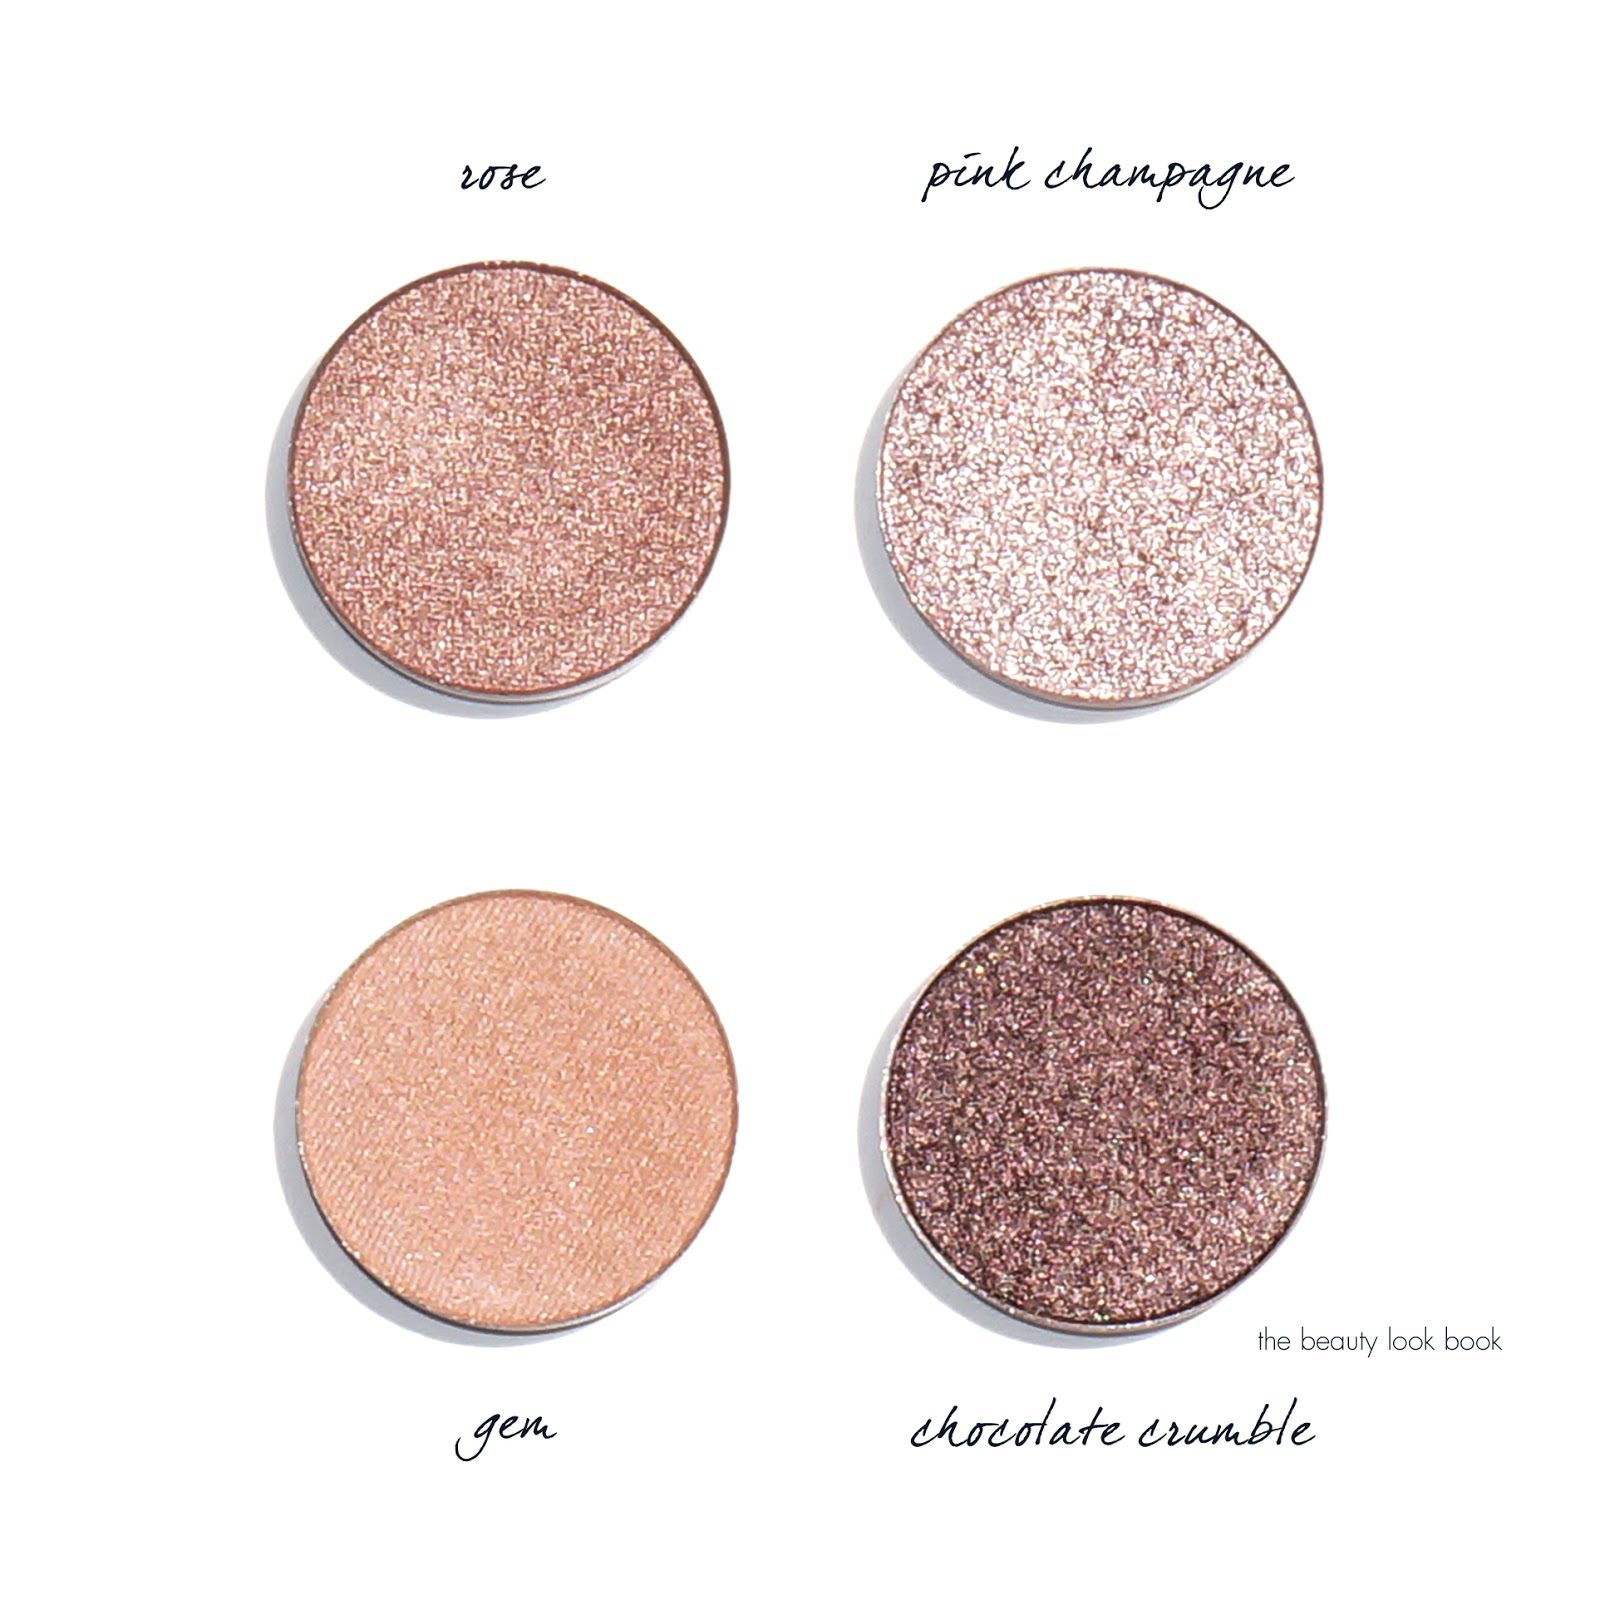
- Rose (1.7 g) is a neutral-warm mauve pink rose with silvery sparkles
- Pink Champagne (1.6 g) is a cool-toned mauve pink shimmer, a cooler-version of rose
- Gem (1.7 g) is a medium peach champagne shimmer
- Chocolate Crumble (1.5 g) is a cool-toned brown shimmer
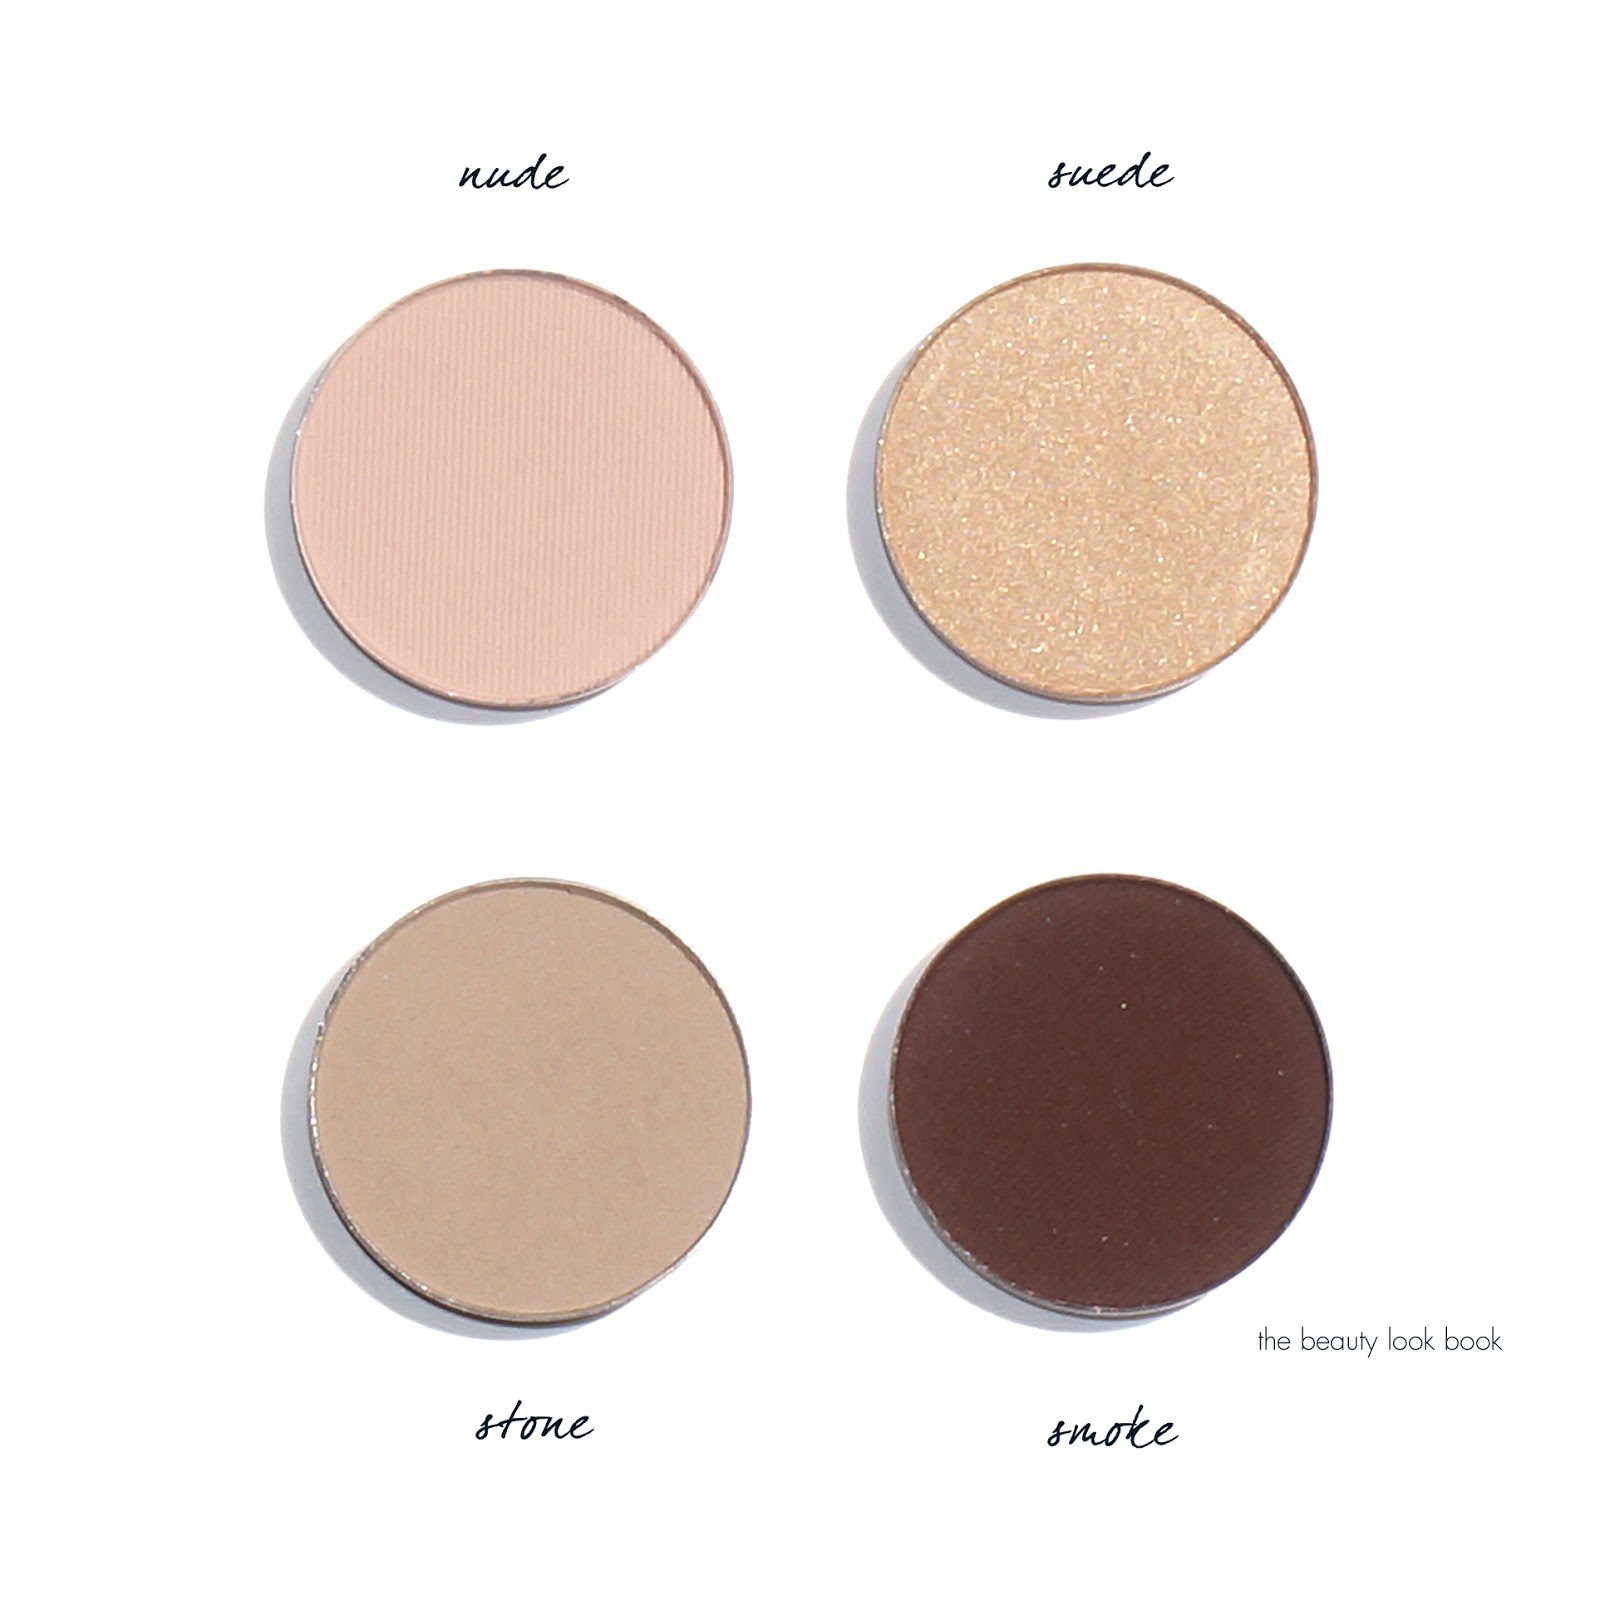
- Nude (1.7 g) is a matte beige pink
- Suede (1.7 g) is a soft pale yellow gold shimmer
- Stone (1.7 g) is a light to medium neutral-cool brown
- Smoke (1.7 g) is a matte neutral brown
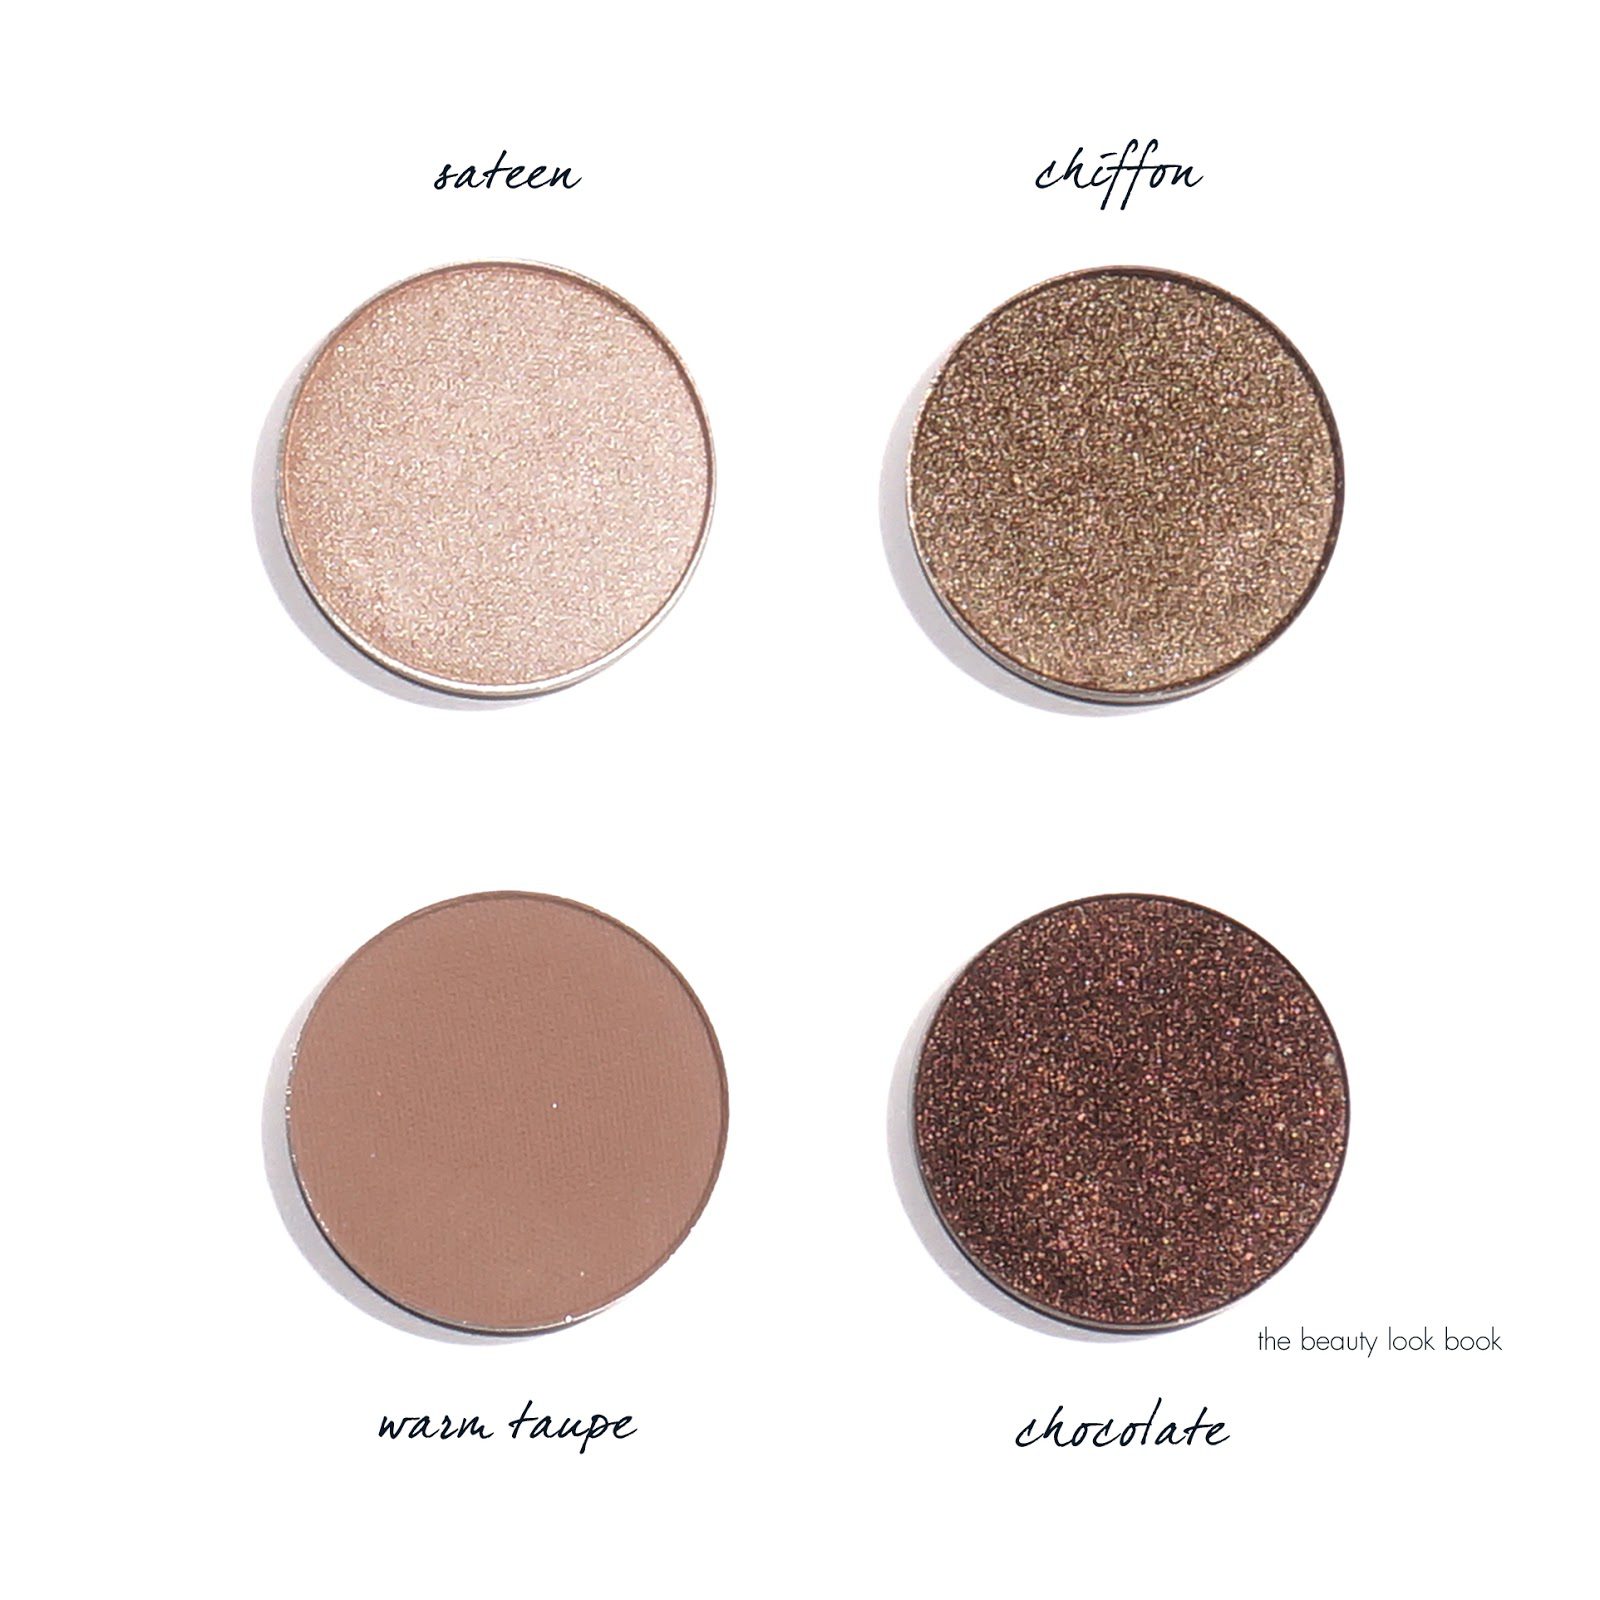
- Sateen (1.3 g) is a shimmery pale champagne frost
- Chiffon (1.5 g) is an olive khaki kind of shimmer
- Warm Taupe (1.7 g) is a medium warm taupe shade matte
- Chocolate (1.6 g) is a shimmery medium chocolate brown
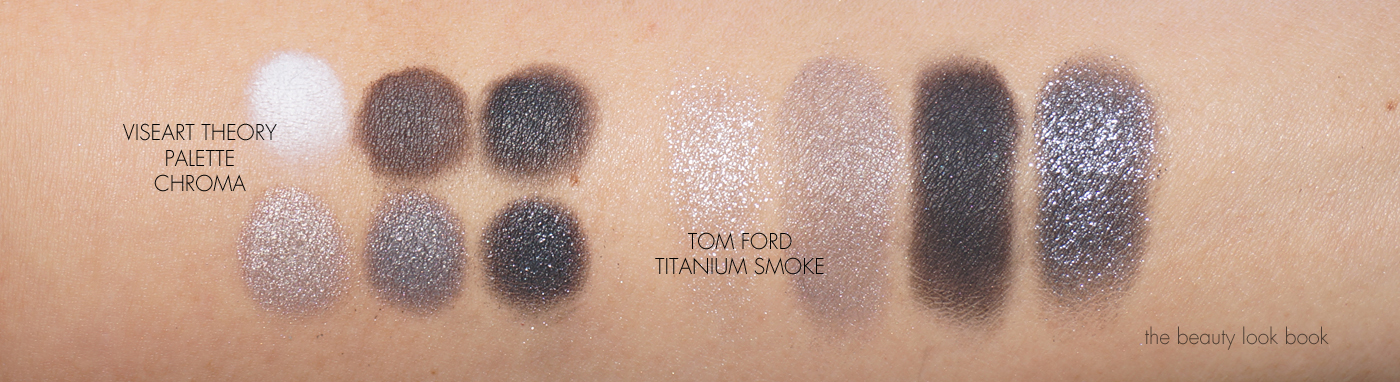
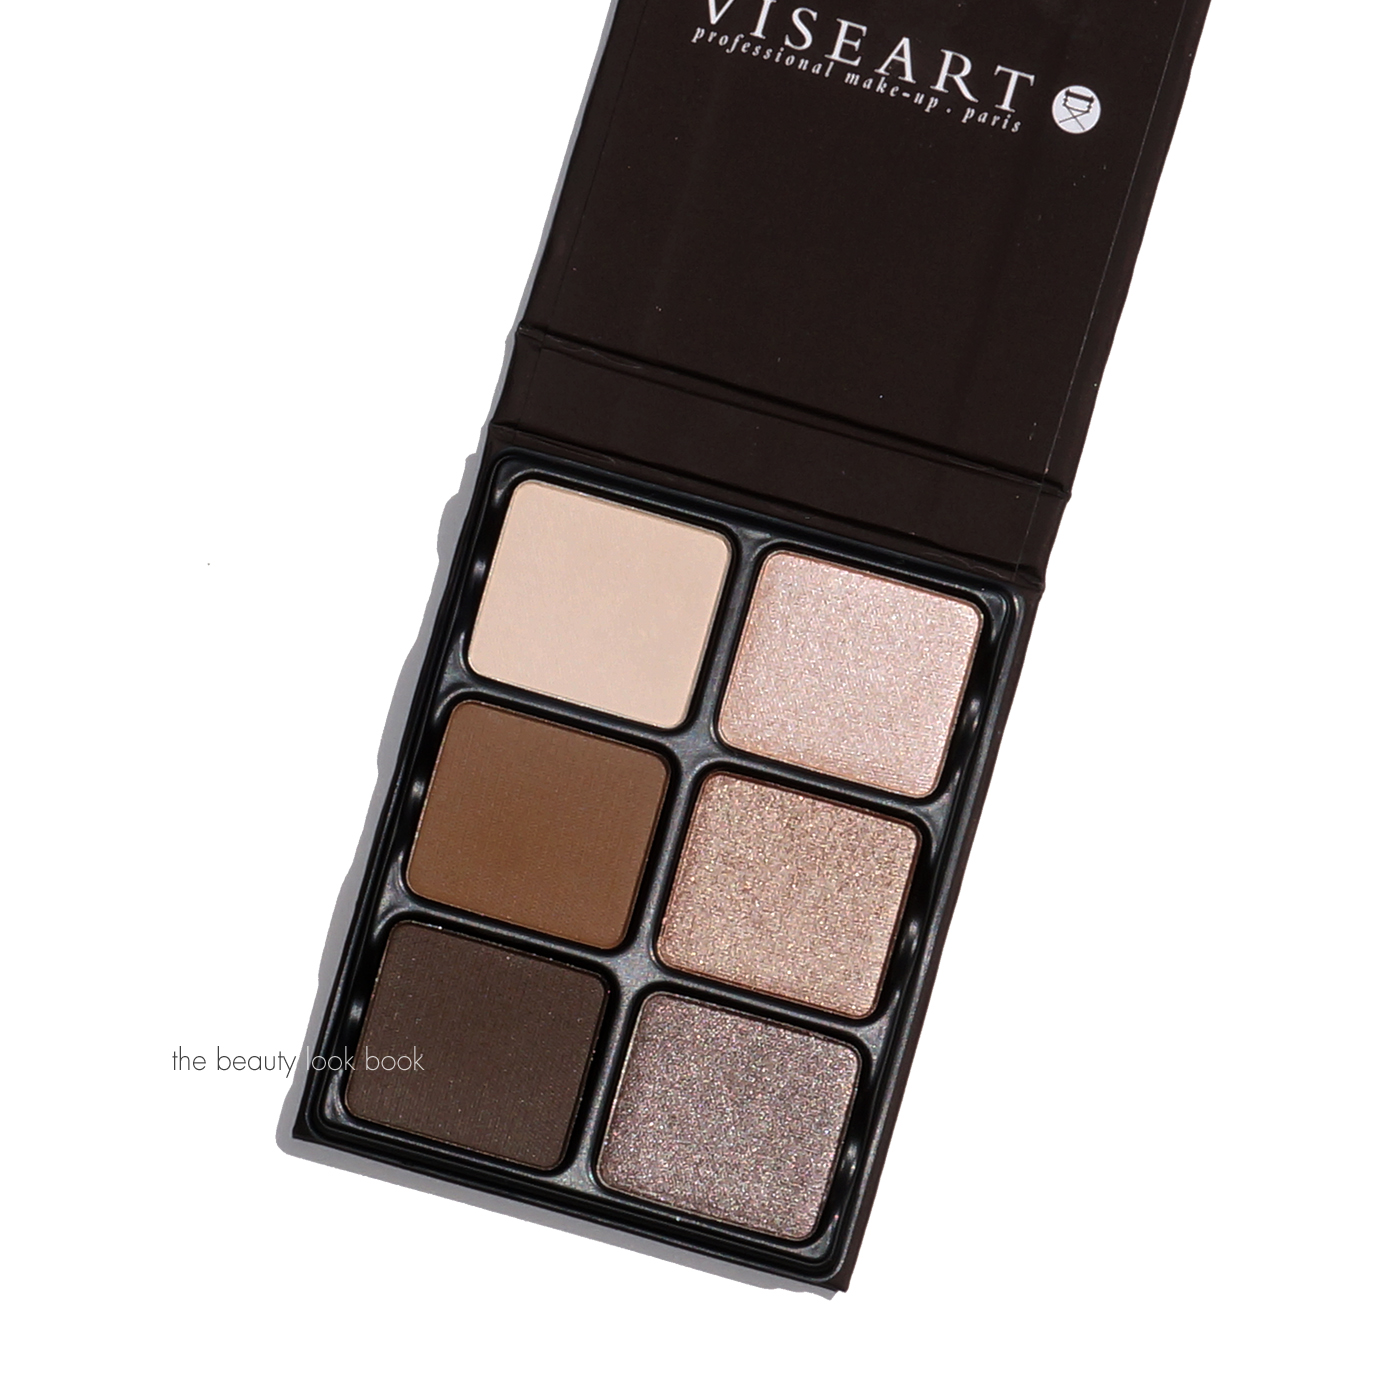
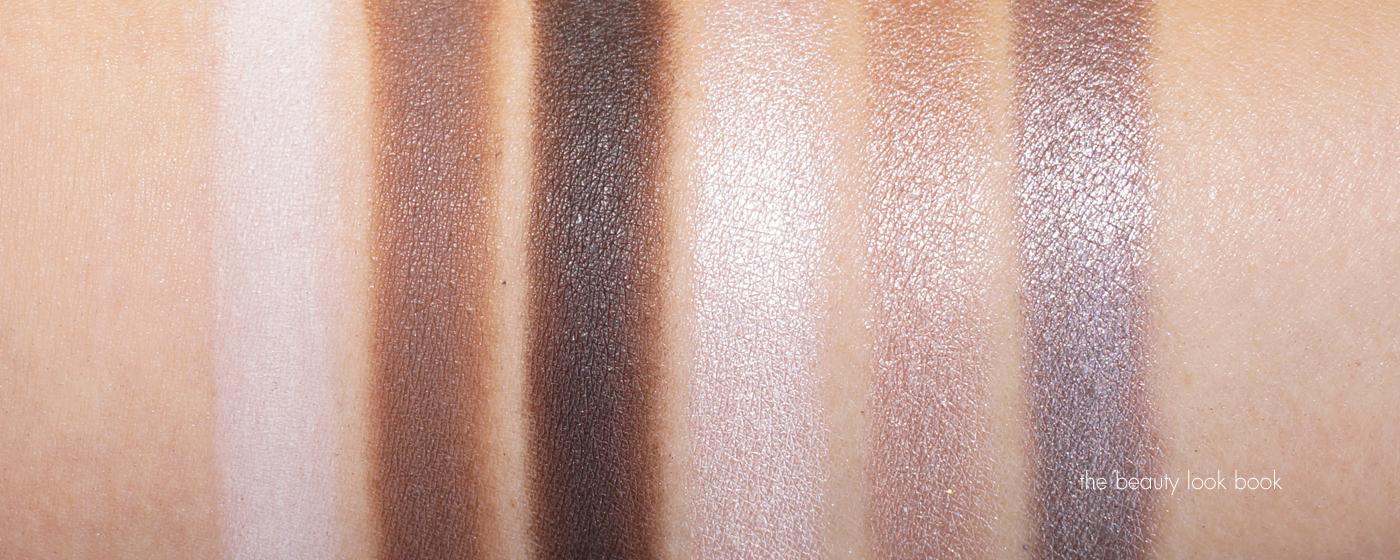
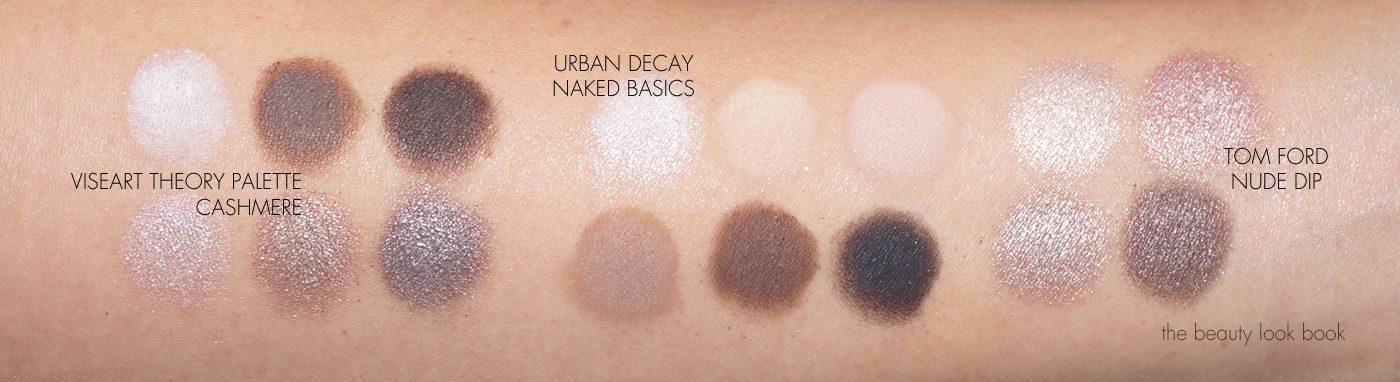
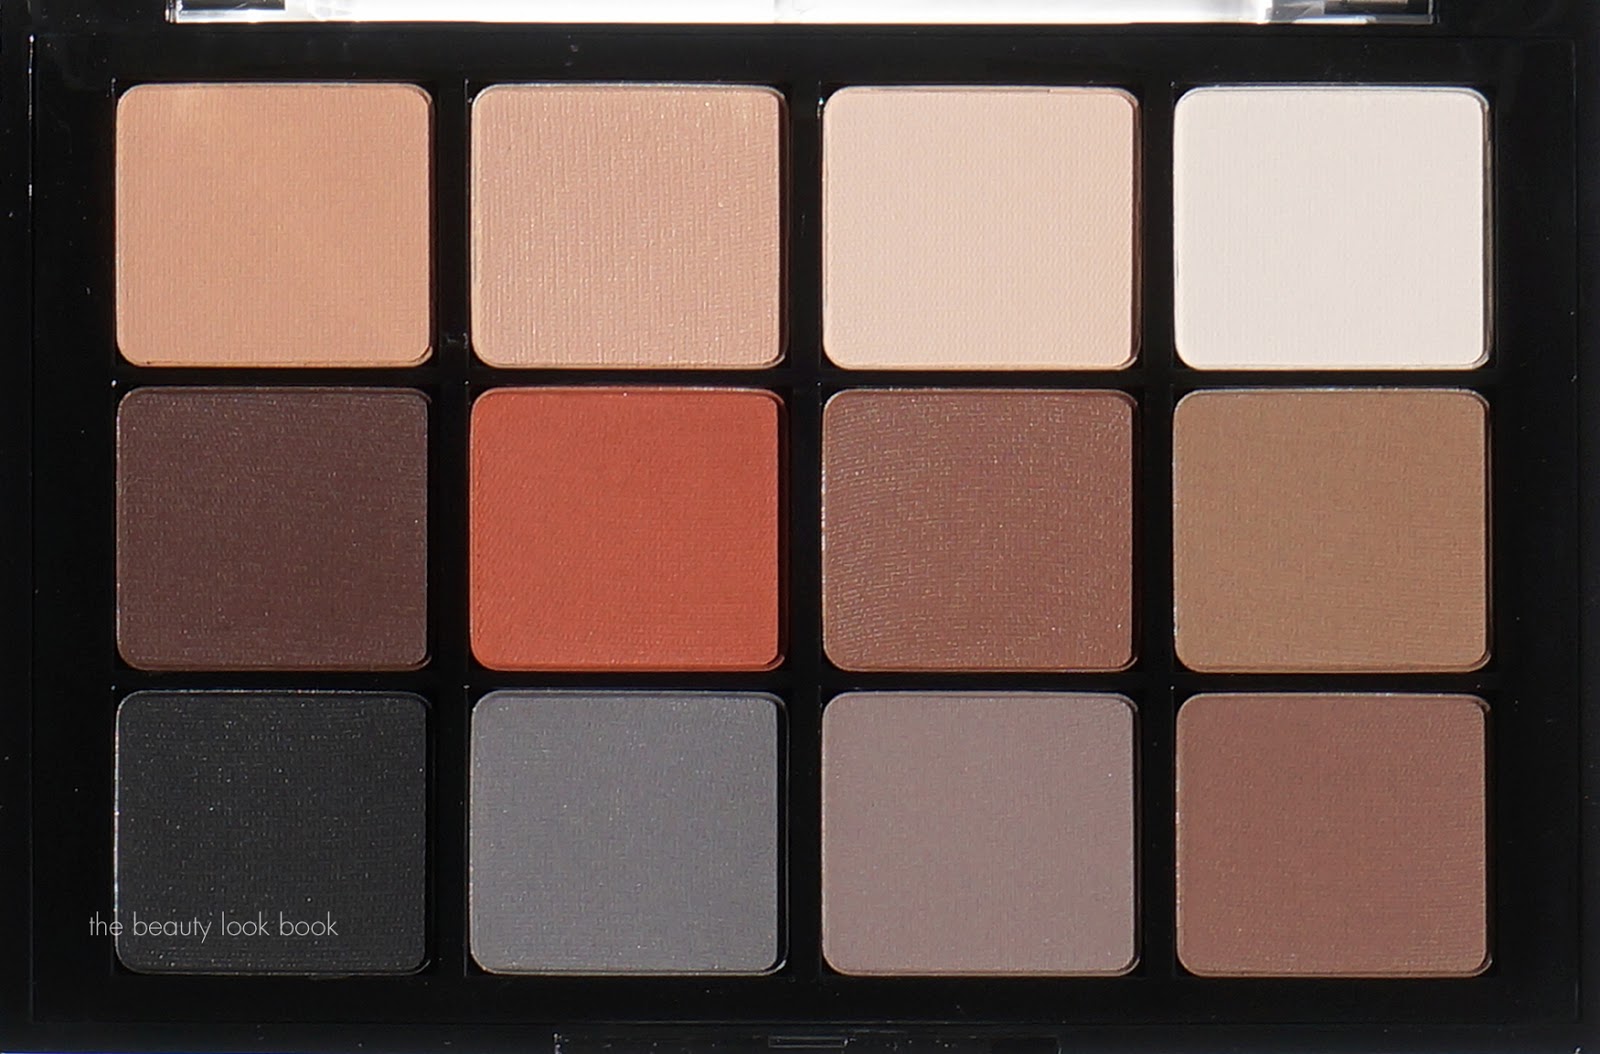
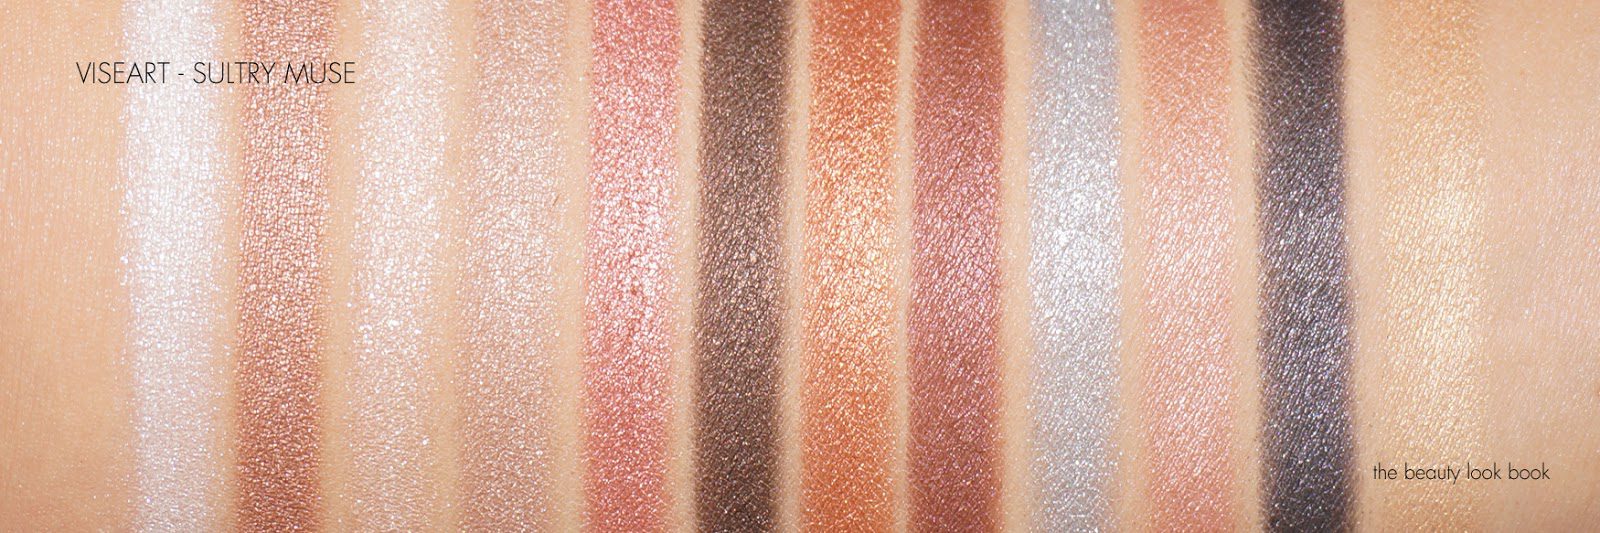
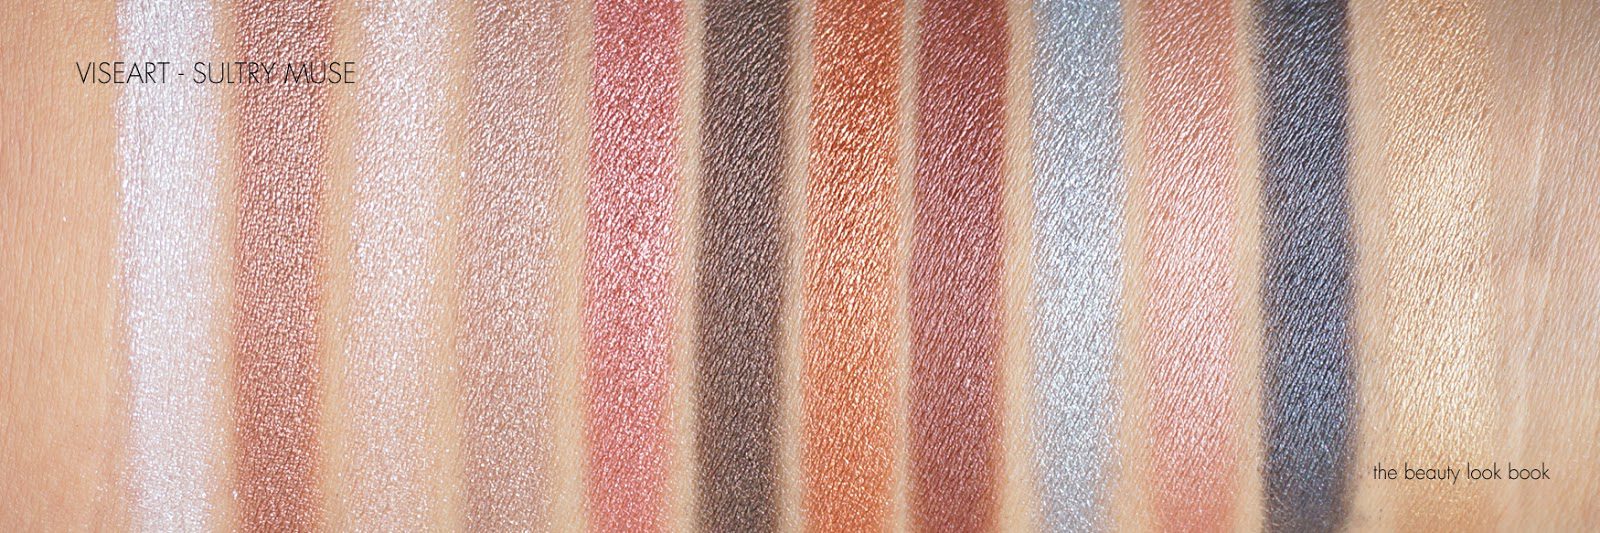
Close ups and swatches:
Some look extremely frosted when swatched on the arms or back of the hand. Once on the lids though the finish of the shimmer is more subtle and definitely very wearable for everyday.
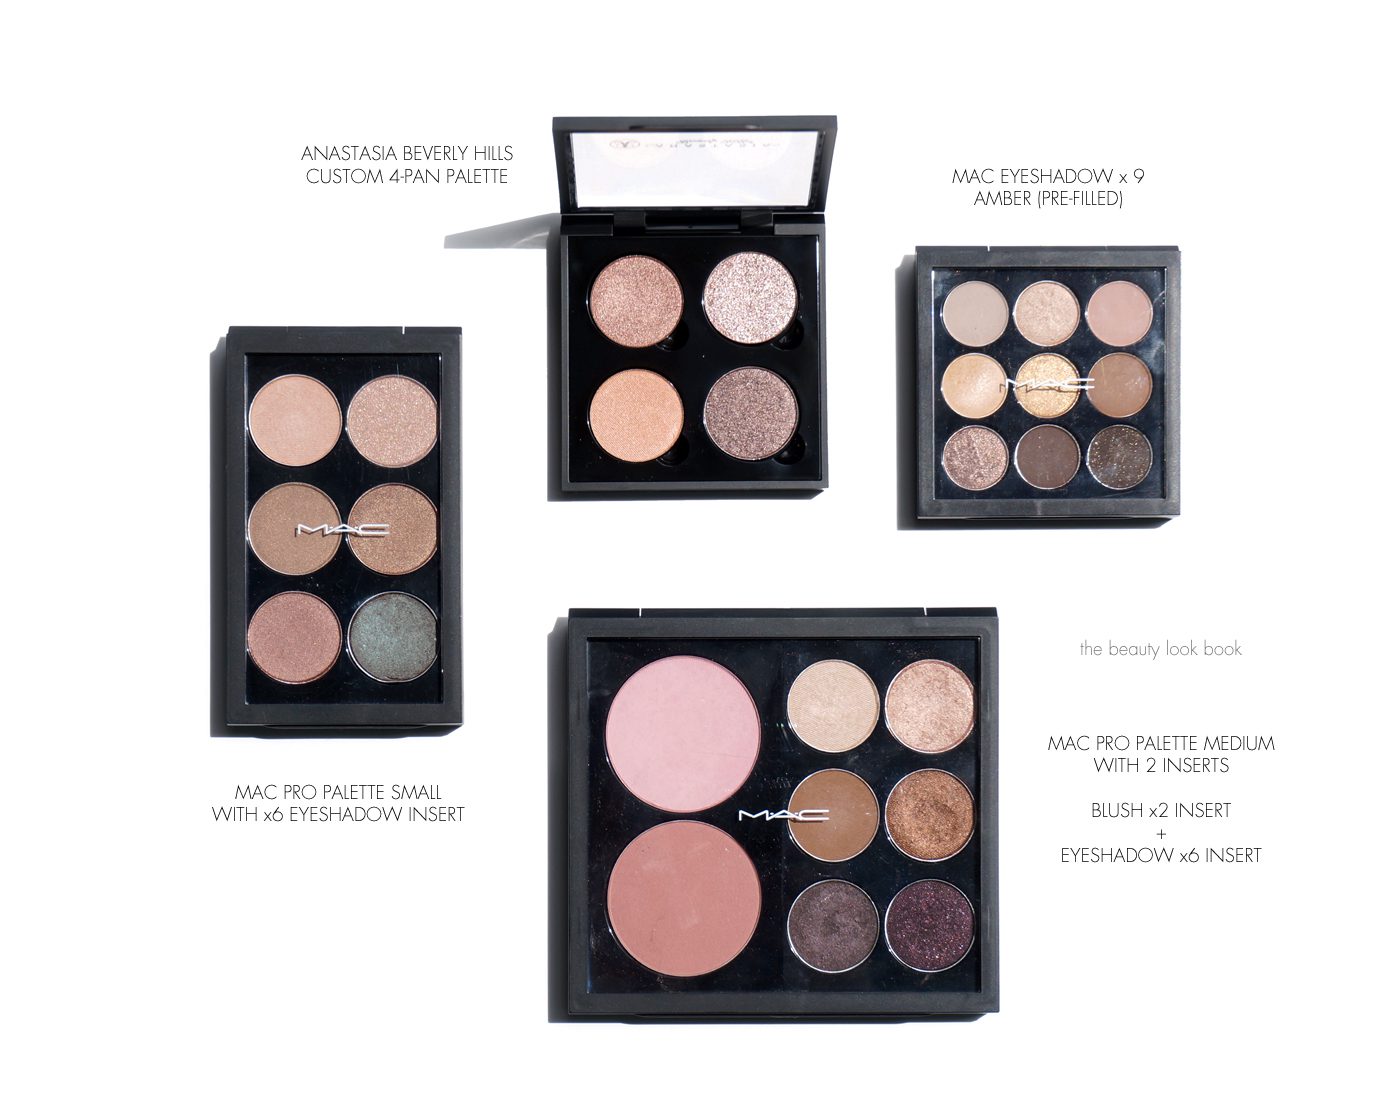
While the price per shadow is reasonable – completing a palette does add up costing $49 for a complete palette. By comparison MAC has reduced the price of their Pro-Palette refills at MAC stores to $6 per pan with the price of the compact at $8 totaling $32. Of course the formulas are different and amount of product you get is different (weight varies depending on formula). Just a few things to consider if you are price/value conscious. MAC just launched new palette sizes and inserts that allow you to mix and match products. I really love the concept and I’ve been a long time fan of MAC products. A more detailed review to follow on the MAC pro palettes (so much to do and not enough time) but here’s a quick look at a few of the different options. As you can see below the pans of the Anastasia eyeshadows are the same size as the MAC eyeshadows. The only one shown below that is pre-filled and non-customizable is the MAC x9 palette. You can find all the MAC Pro Palette Options on their website here and at MAC Stores.
So you might want to know how do the Anastasia eyeshadows compare to MAC. If you’ve played with MAC before you know there are a lot of different formulas and finishes. Pigment, shimmer factor, color payoff and density depends on the formula. In general here are a few thoughts:
- the MAC mattes have a softer more natural finish but harder texture compared to the Anastasia mattes, color payoff of Anastasia is more pigmented
- the MAC Veluxe Pearl shadows have that almost buttery soft velvety finish that is similar to that of the Anastasia shimmer eyeshadows, color payoff is excellent for both
- some of the Anastasia eyeshadows like Rose, Pink Champagne, Chocolate Crumble, Chiffon have a more metallic finish compared to MAC shimmers
- overall texture of the Anastasia eyeshadows is softer and more velvety while the MAC eyeshadows tend to have a slightly stiffer or harder texture
- is one better than the other? I would say sometimes yes, sometimes no. MAC Shroom is one of those classic all over wash kind of shades that has the perfect semi-sheer texture to blend out colors, Anastasia Sateen by comparison is similar in color but a lot more pigmented and a lot more frosted which gives more contrast on the lids if you are medium to tan to deep. In this case it really depends on what kind of look you want, how much shimmer and how much pigment. Sheerer finishes aren’t necessarily bad – I love sheer washes for a lot of reasons.
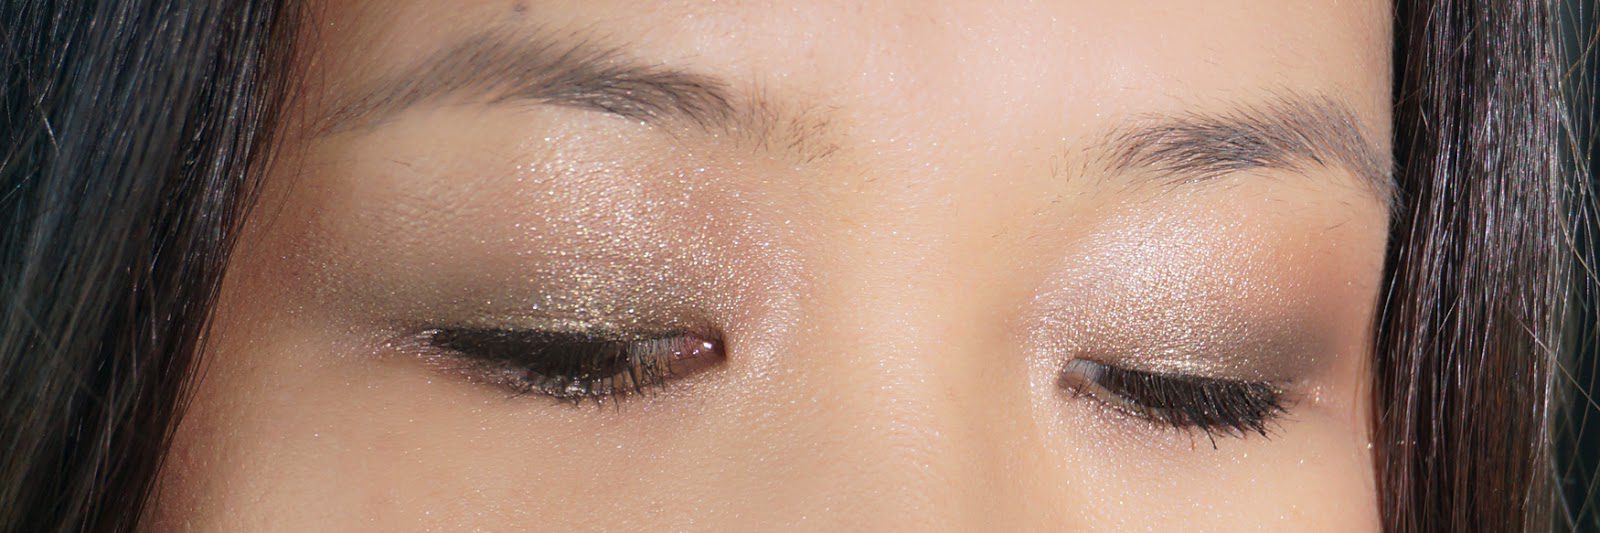
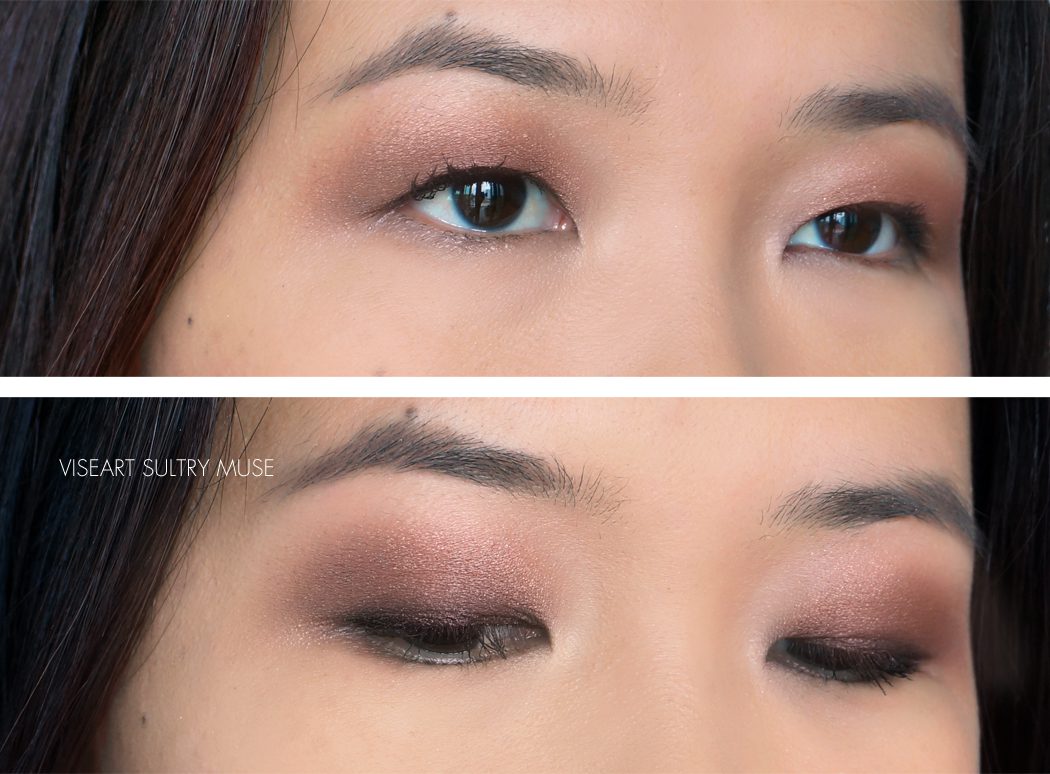
A quick look with the quad I put together with Sateen, Chiffon, Warm Taupe and Chocolate Crumble blended together on the lids:
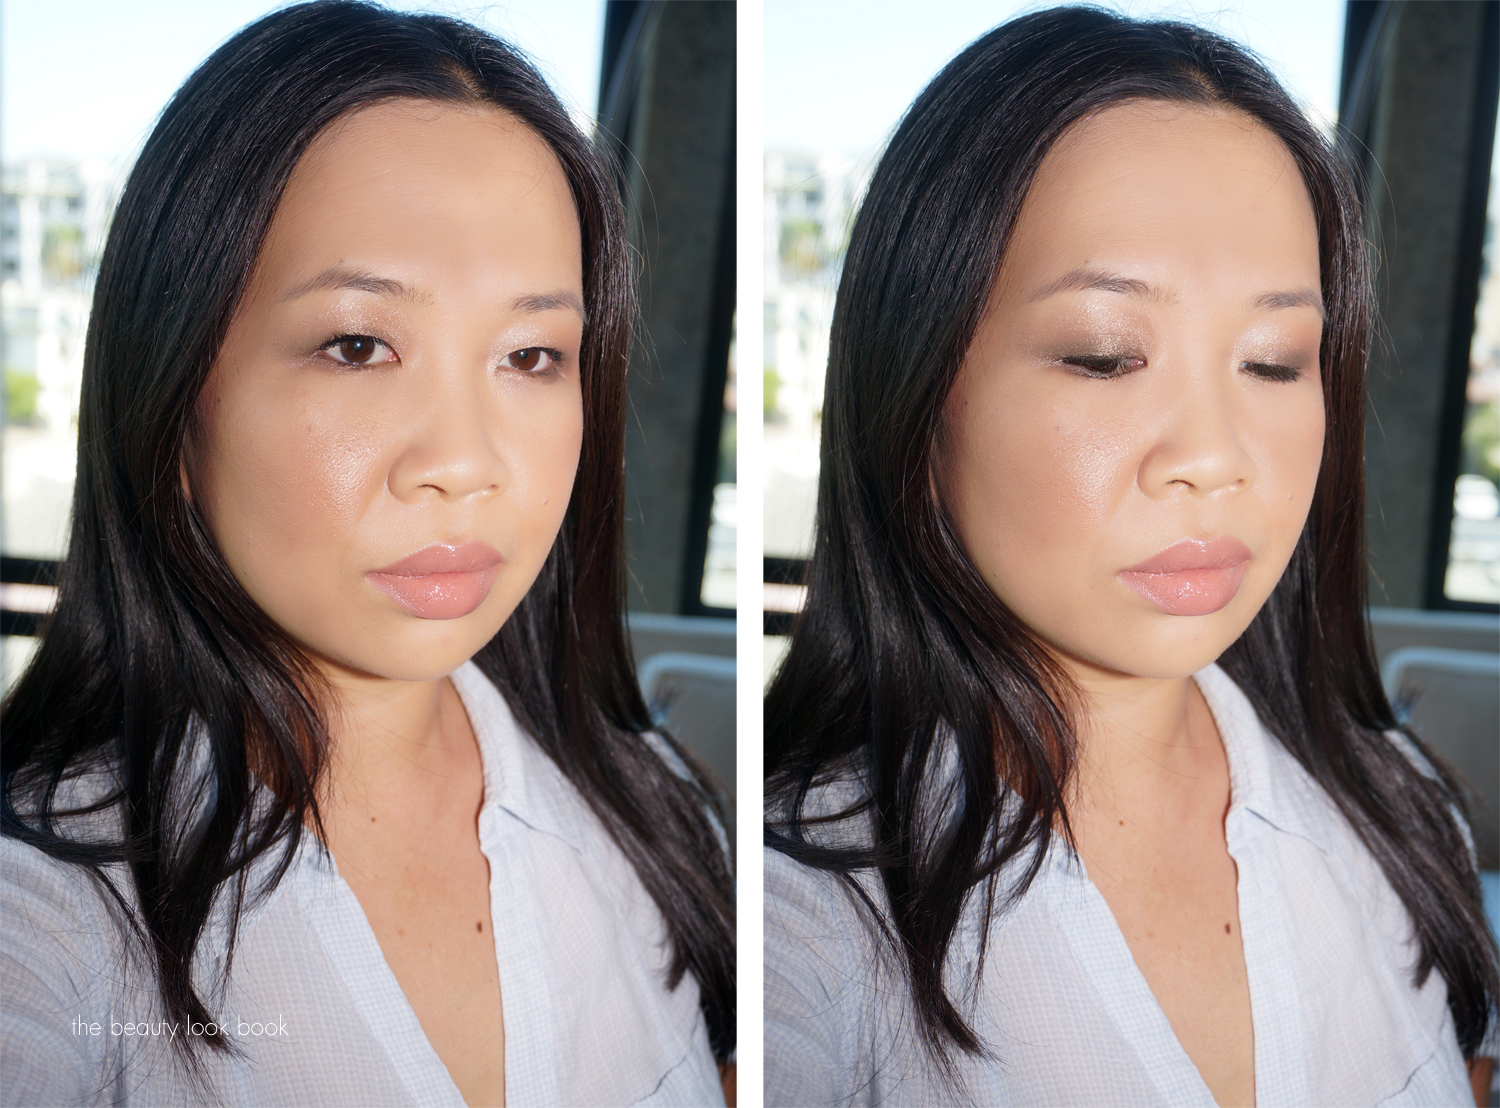
Products worn:
- NARS Velvet Matte Skin Tint in Groenland + St. Moritz mixed
- La Mer The Powder Translucent to set
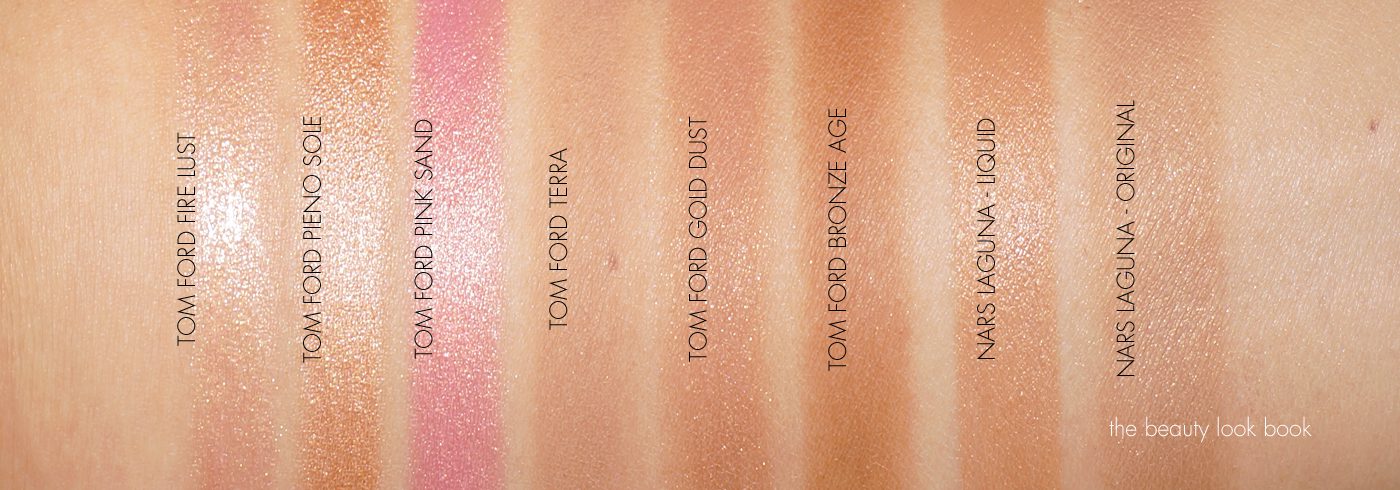
Anastasia Glow Kit in Sundipped shades Bronzed + Tourmaline mixed on the cheeks - Tom Ford Bronzing Powder in Terra to add warmth
- Anastasia Eyeshadows in Warm Taupe, Sateen and Chiffon on the lids mixed
- Chanel Le Volume Mascara in Black
- Tom Ford Eye Defining Liquid Liner in Black
- Anastasia Liquid Lipstick in Stripped mixed with MAC Lustreglass in Love Nectar on top
The eyeshadows exceeded my expectations and I think every color I tested is top notch in terms of color, pigment, blendability and everything else I would want in an eyeshadow. I’ve forever been searching for an antique olive kind of shimmer eyeshadow that I can wear and Chiffon is IT! Most have a tiny bit too much green which clashes with my olive/yellow skin. The colors Rose and Pink Champagne are wearable pinks – huge for me since so many pinks can give me that unflattering pink-eye kind of look. Bottom line is I can’t wait to explore more of the colors. If you have any loves please let me know!
You can find the Anastasia Beverly Hills Eyeshadows at Sephora, Ulta Beauty, Macy’s and on the Anastasia Beverly Hills website. I have not yet tried any of the palettes as many of them have had bold colors I did not think I would wear, but they did look interesting. As always would love to hear about your loves or thoughts on these. If you’ve been looking into them I hope these swatches are helpful!
P.S. I’m very behind on responding to comments – but will try to catch up soon!


