Browsing Tag

Sephora Collection

Uncategorized

The Makeup Show LA March 2016 Event Recap + Haul

March 24, 2016

I attended The Makeup Show LA last weekend and it was one of the best makeup events I’ve attended. This year they had over 150 brands at the show – I love events like these that support beauty professionals in so many aspects. If are able to attend one I highly recommend you do. In recent years they’ve expanded their stops to some additional cities with pop-ups. Full calendar and list of upcoming shows on their website The Makeup Show. This was my second year attending although they’ve been making an appearance in LA for ten years now.
Urban Decay Cosmetics made an appearance this year with their full line available (items were offered at a 30% pro discount). Most of the brands offered generous discounts during the show for professionals to stock their makeup kits or explore new launches (some like Kevyn Aucoin offered discounts of 40% off). In the excitement of being able to swatch and play with so many things I neglected to take as many photos of the show as I had hoped, but here are a few I hope you will enjoy.

In the morning I attended the Press Preview where The Makeup Show Director of Artist Relations and Education James Vincent gave us an overview of show highlights, new product launches along with some inspirational thoughts about the business of beauty, building your own brand and the importance of knowing how to merging art and commerce.

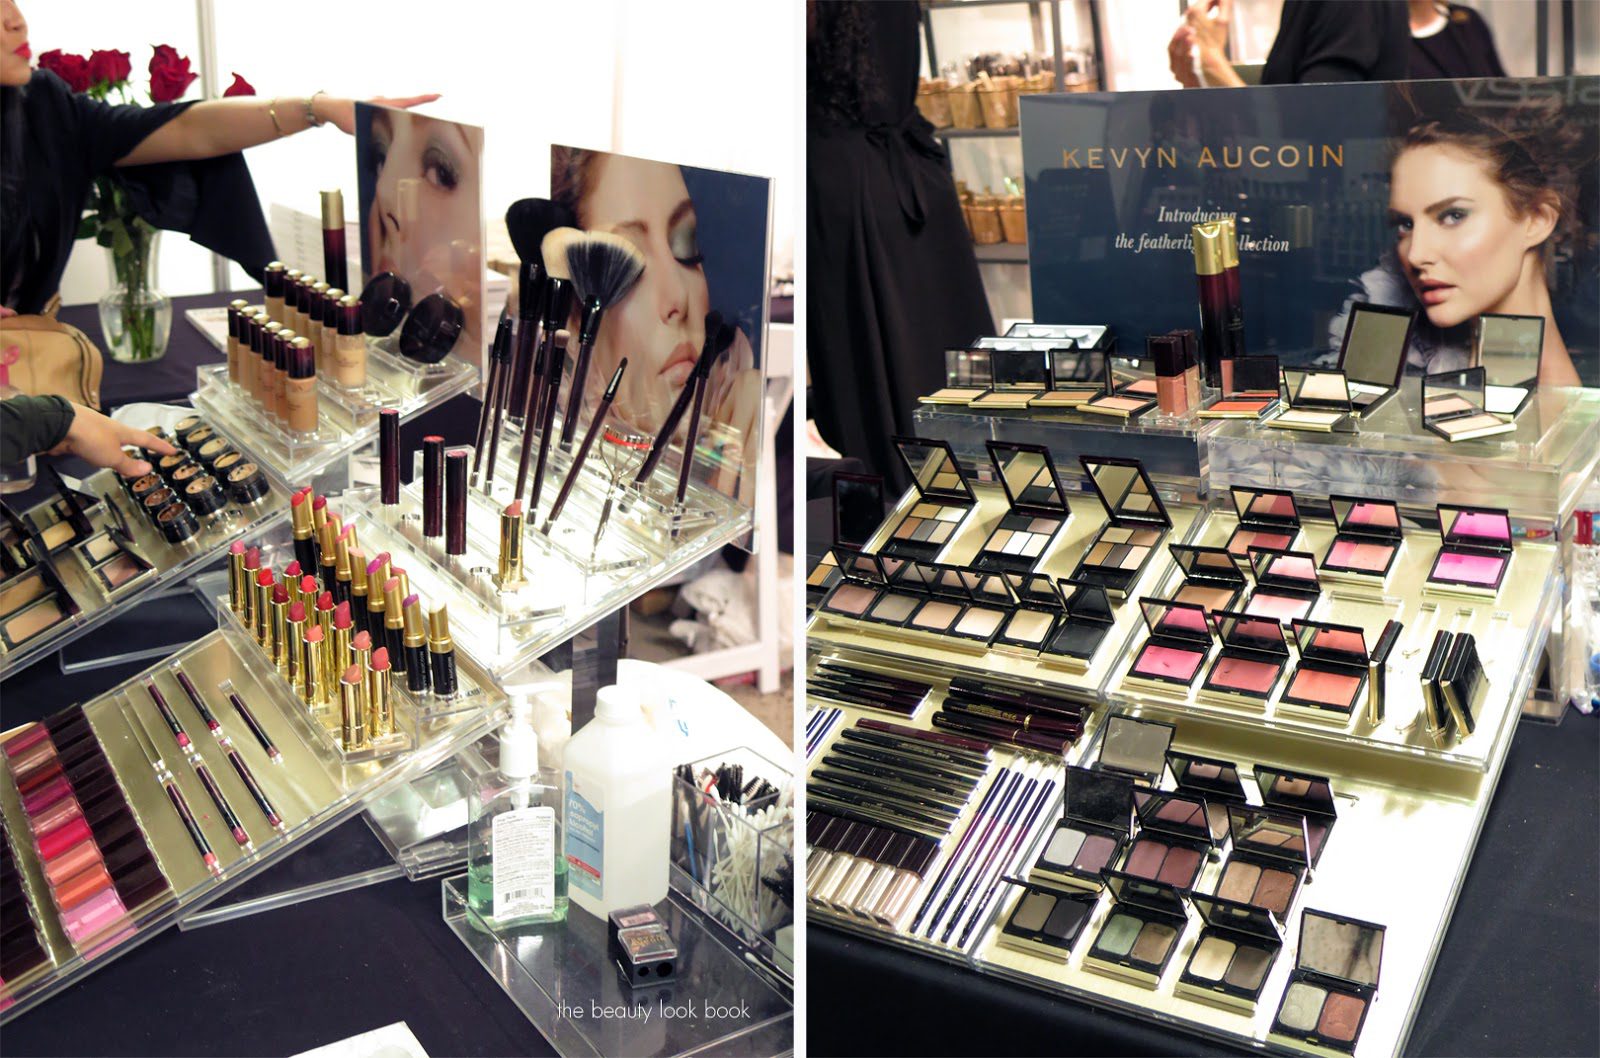
A look at some of the booths, first is Kevyn Aucoin. They had the new Featherlight Collection for spring available along with the full line of makeup and brushes. I had their Sensual Skin foundation on my wishlist to try out but did not want to wait to get matched at the show.
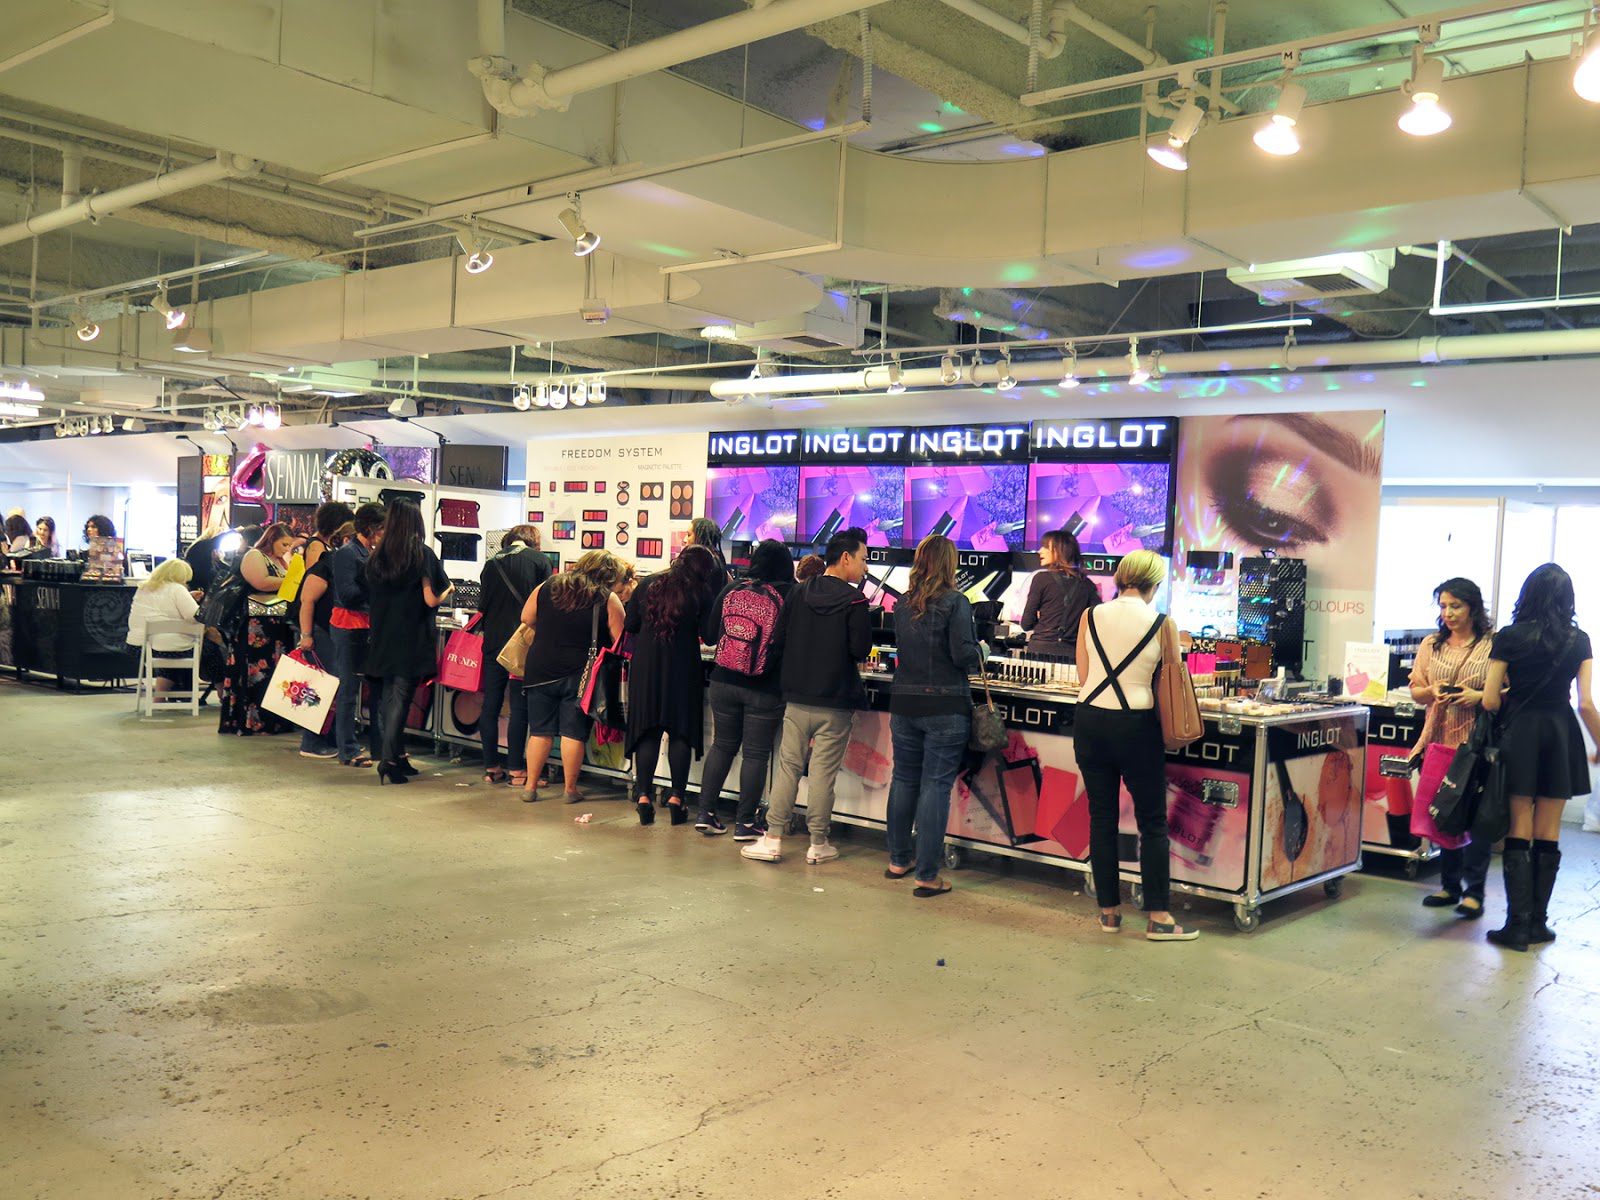
Inglot booth:

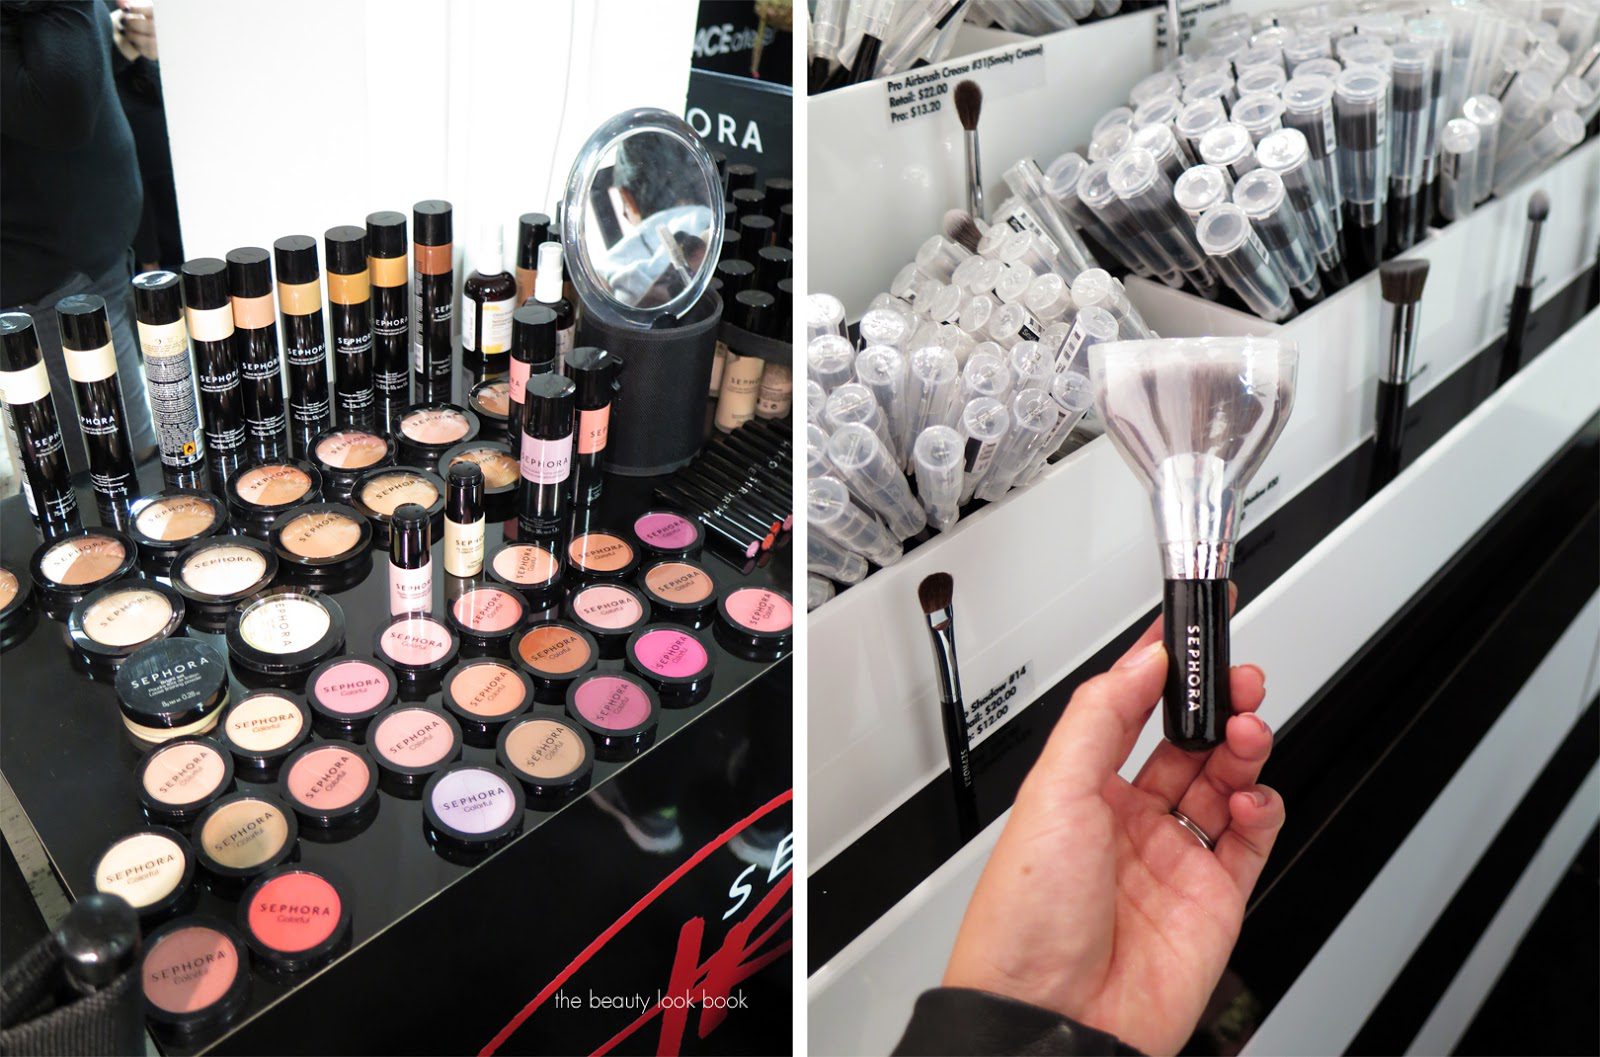
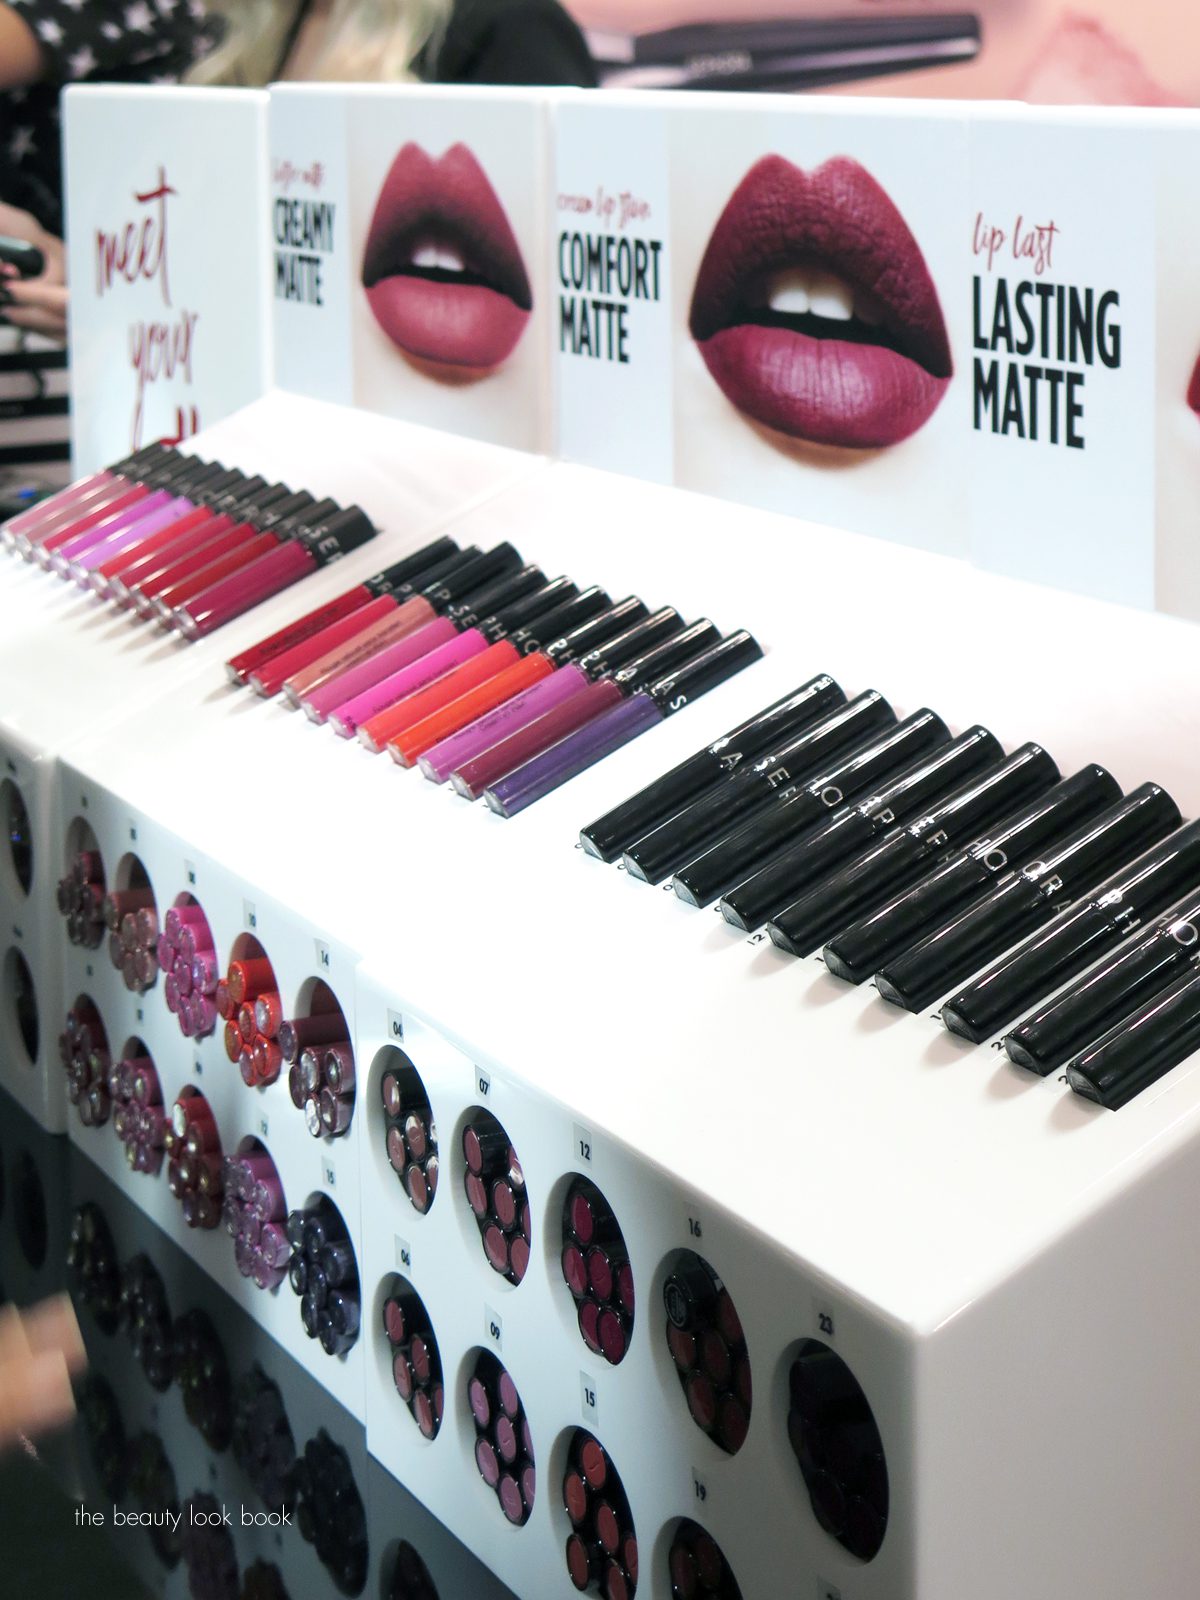
Sephora Collection booth was very busy with lots to explore, pro discount offered at the show was 30% off so I picked up another of my favorite foundation brush and a few of the matte lip products:

Scott Barnes was showcasing their new Multi Media Liquid makeup, based on the raves from several of you, I did get a color match and picked up the shade Creme Fraiche. I haven’t tested it yet, but will have to see in natural light if the match was indeed correct. They also had mini Body Blings which I wish I had picked up one to try out, but since I don’t usually use body shimmers, it’s probably not a huge miss.

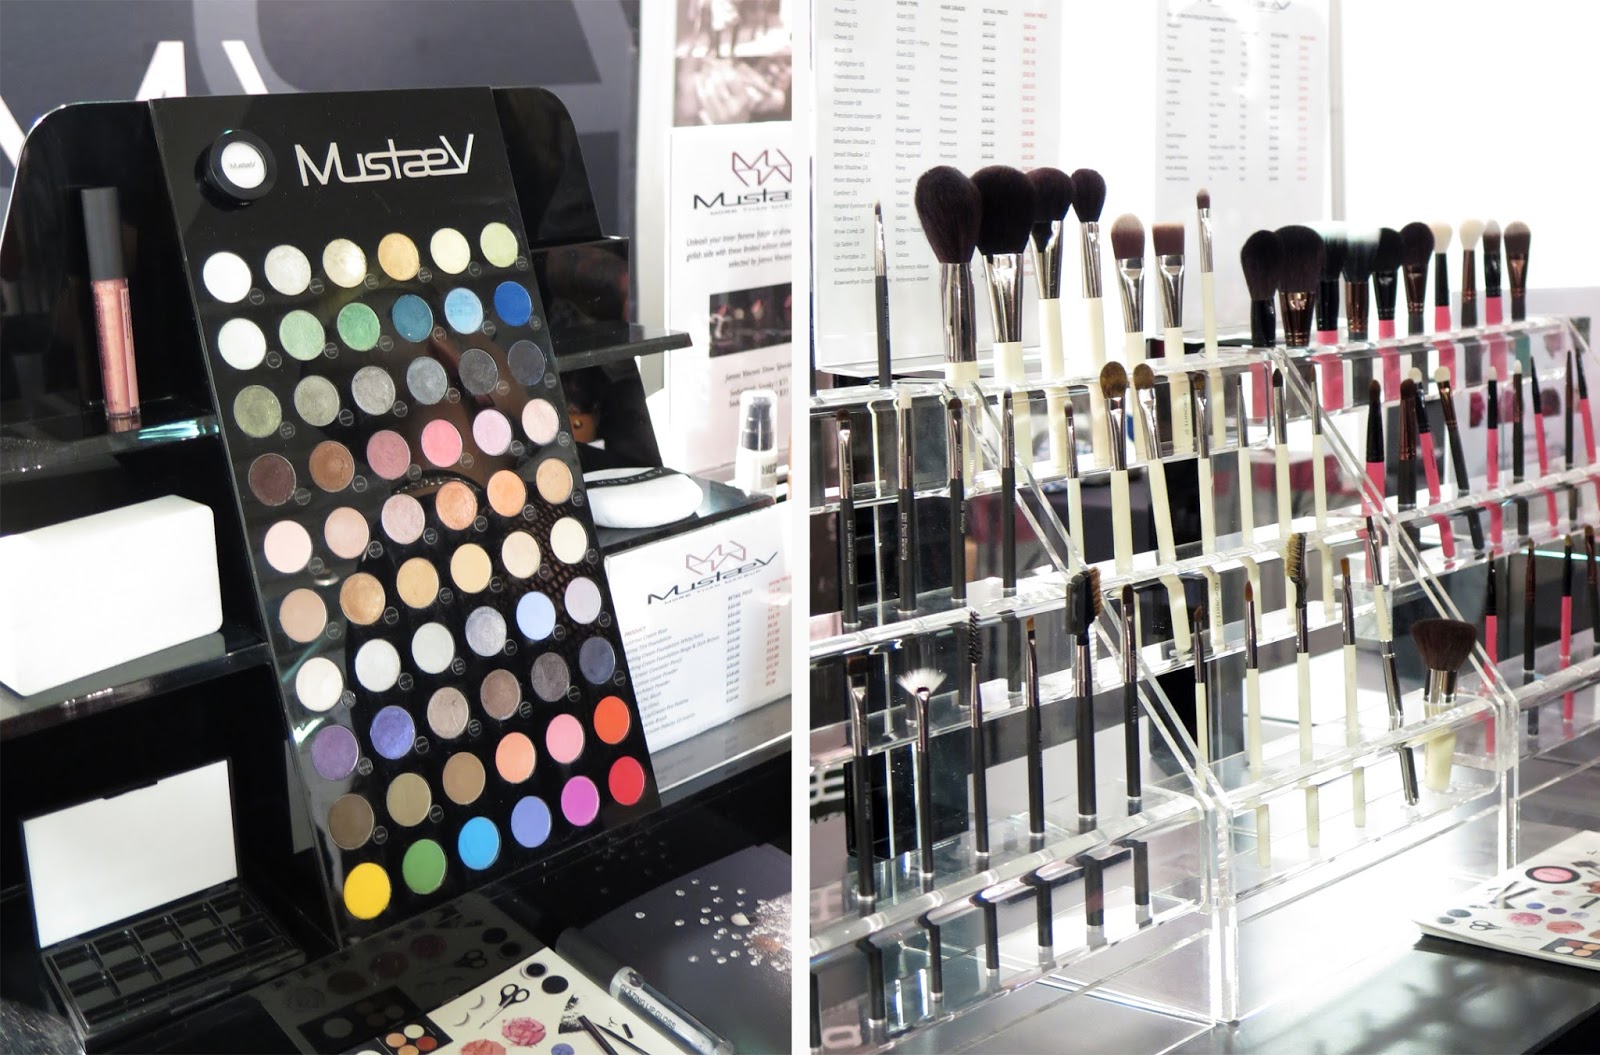
I’ve been a huge fan of the MustaeV Lustrous Cream Base and Skinny Tint Foundation. They are expanding their color selection for the foundation since it only comes in three colors right now.  I was hoping they would have the new shades available at the show, but they won’t be launched for a few more months. If you’d like a review now of what I do have – let me know in the comments.

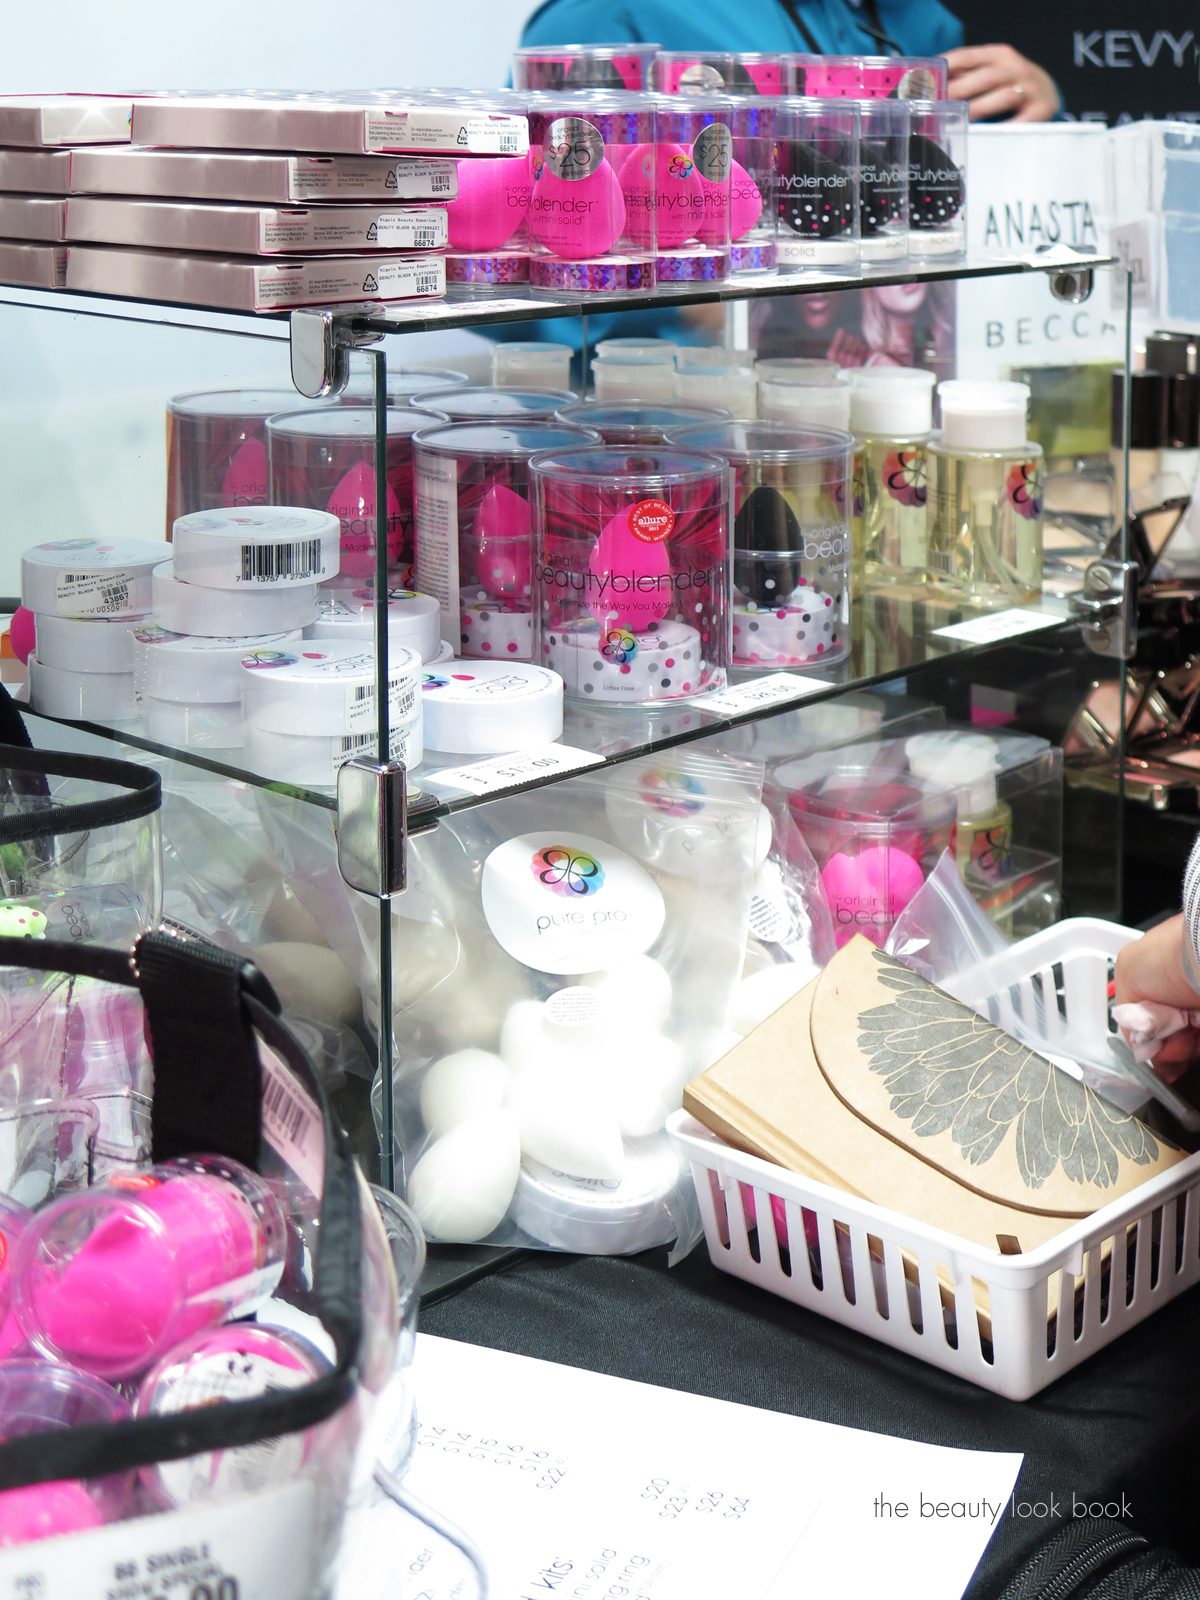
Nigel’s Beauty Emporium is a beauty supply store – at the show they had some of the best values and discounts. I stocked up on beautyblenders last year and did again. They had a Beautyblender Propack of 6 pink (or white) beautyblenders + the solid cleanser for $64 at the show (listed price on their website is $80). Individual blenders were on discount for $16 each. They also had a large number of mixed sets. If you’re in the LA area they have a store in West Hollywood and carry a wide range of brands like Anastasia, Ben Nye, Artis, Becca, Black Up, Make Up For Ever etc.


NARS also had their own booth with the full line. The Laguna Tahiti Collection was available for purchase at the show so I picked up several of the new items as they were available at a pro discount (I can’t locate my receipt at the moment but it was either 30 or 40%).

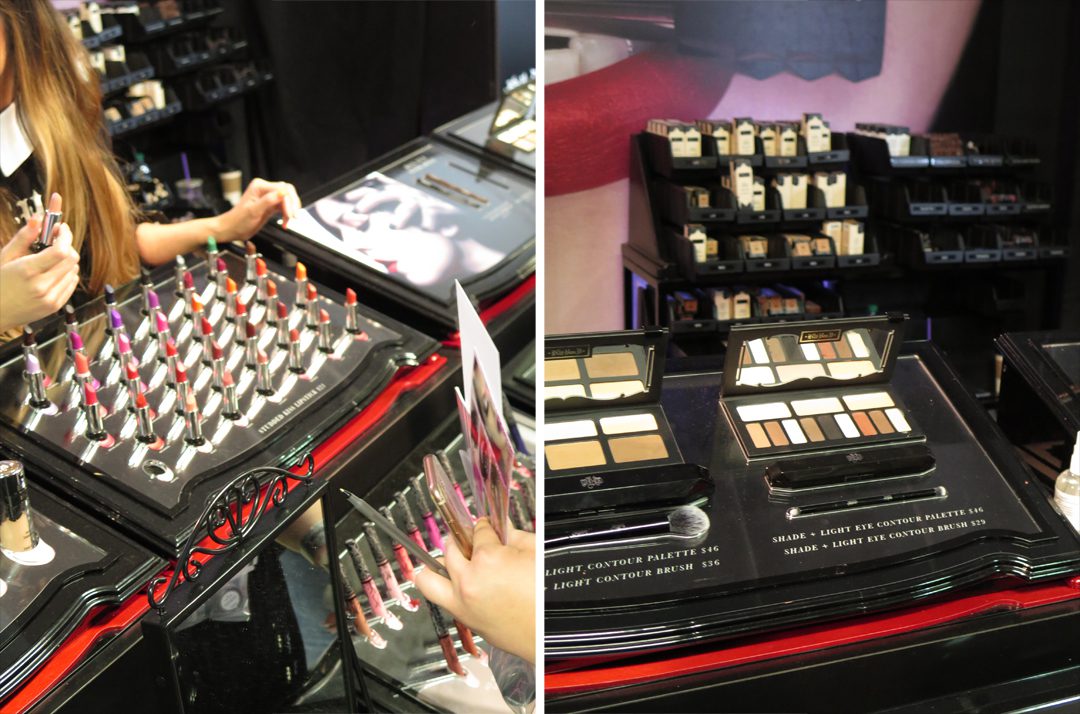
Kat Von D Beauty had amazing bundles at discounted prices on their Shade + Light collection, but the line was insanely long, I took a few photos from outside the line area:

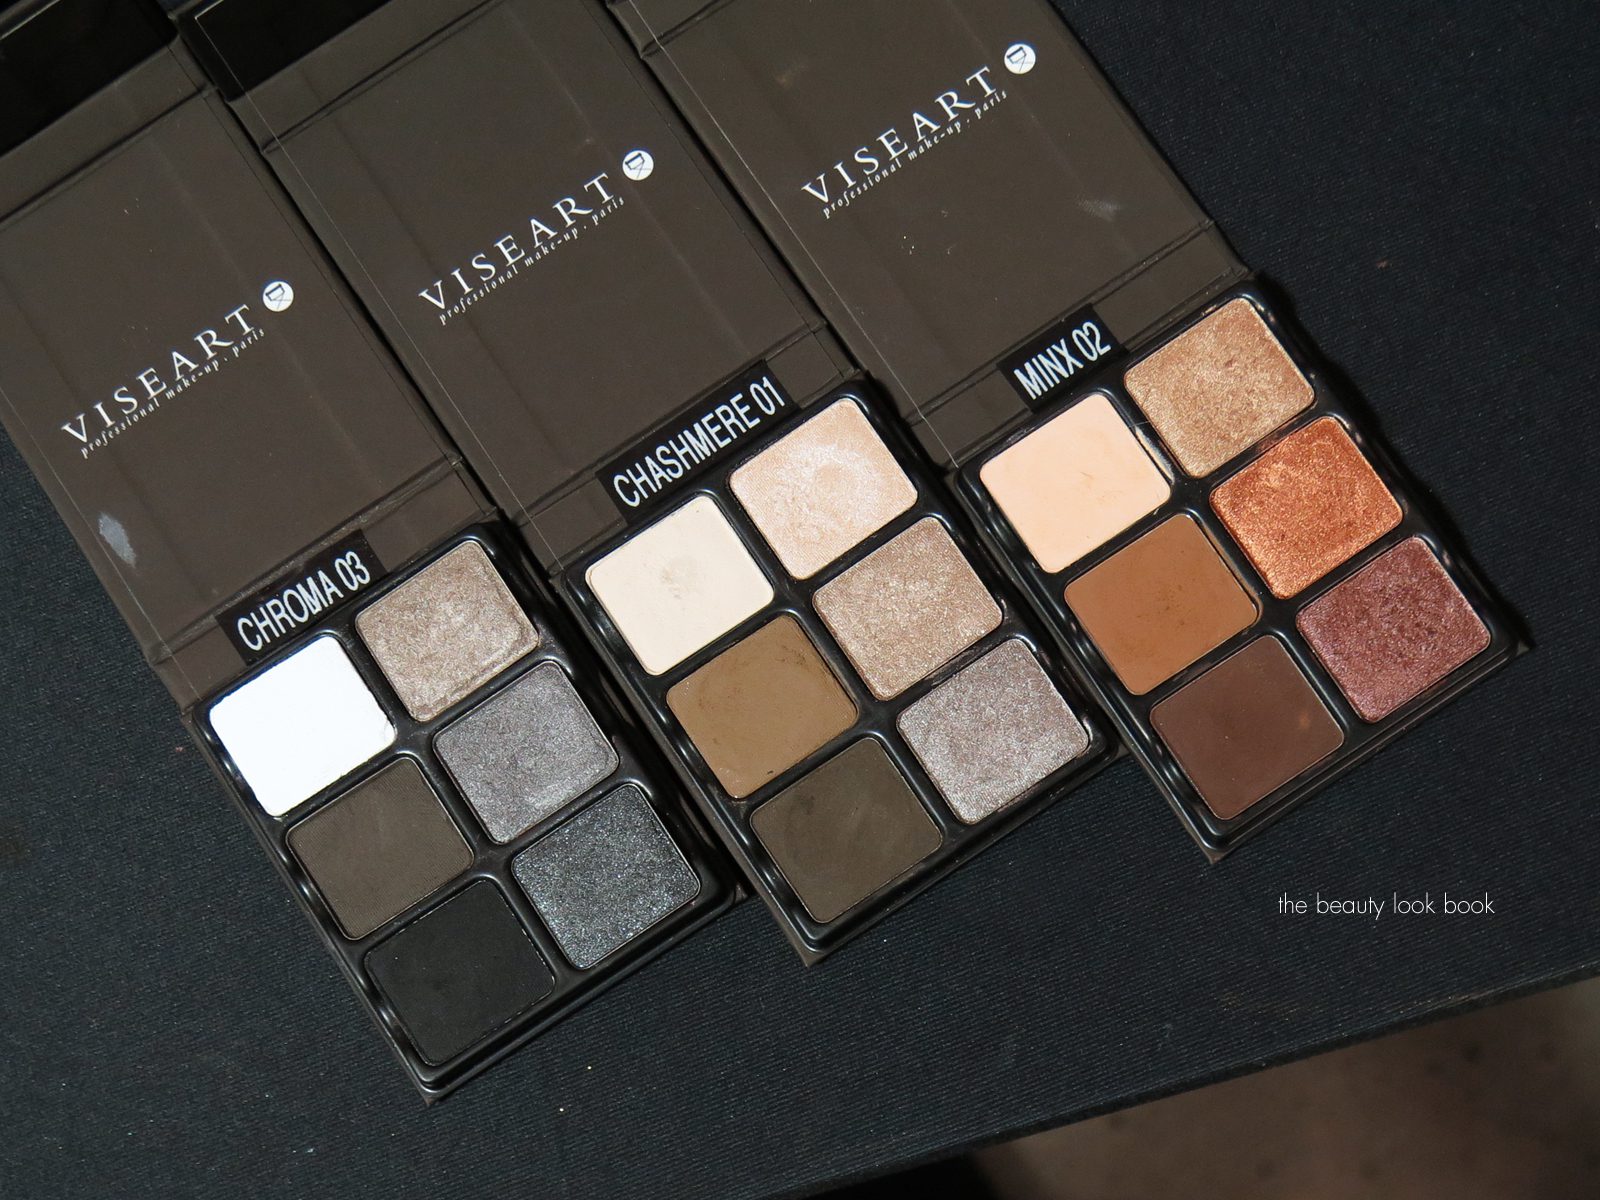
Viseart has three new eyeshadow palettes launching exclusively at MUSE Beauty Pro at the end of the month called Theory Palettes ($45 each). I was hoping they would have these available for purchase at the show, but they only had the testers to play with. The texture and pigment is amazing. You can pre-order them from their website now (estimated ship date is end of March). MUSE Beauty Pro has the exclusive for 3 months on these palettes. I’ve never tried any of the Viseart palettes before – the pro discount at the show was 30% off so I was thrilled to buy my first two last weekend.

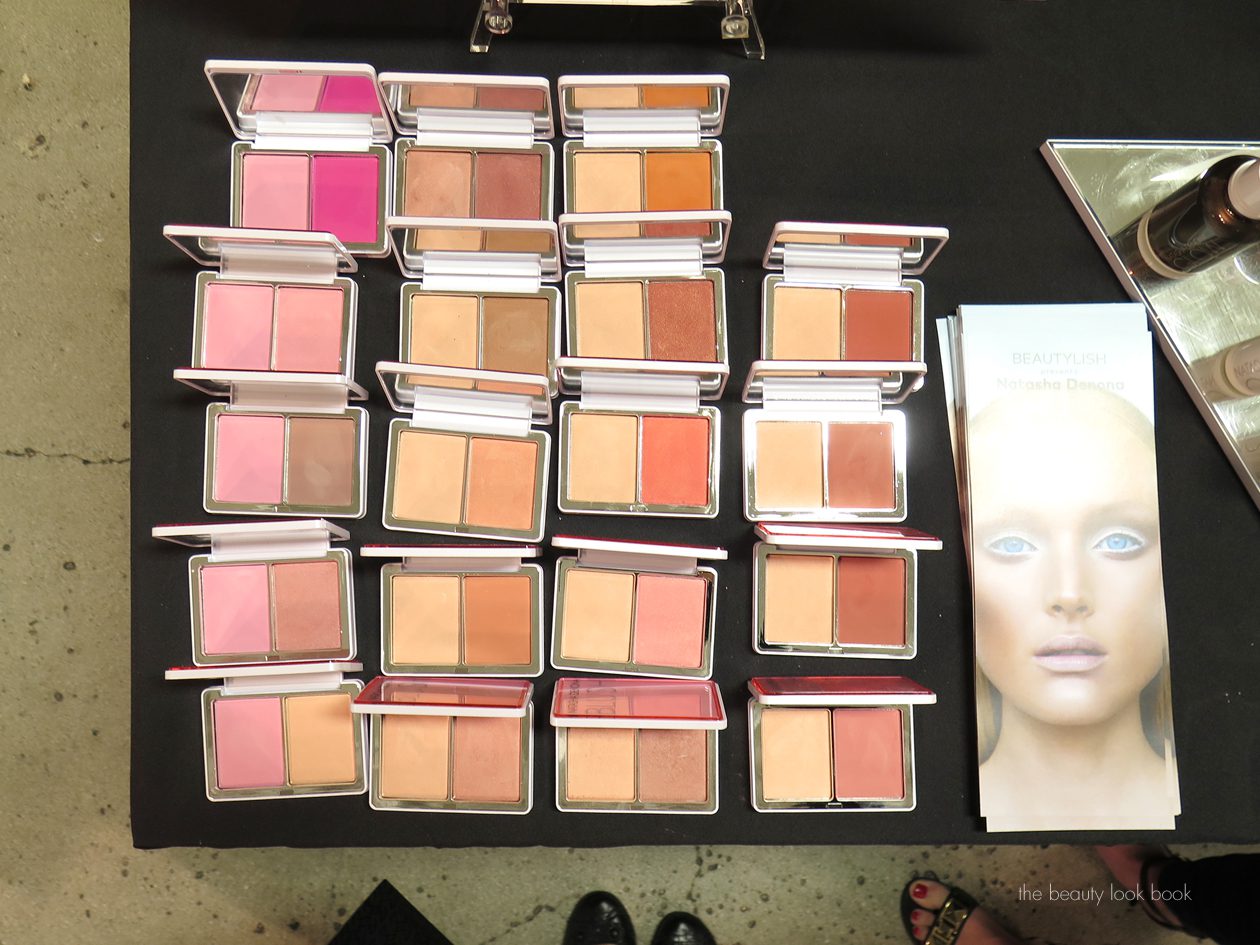
Beautylish had some of the Natasha Denona items on display. I was hoping they would have the entire line available to play with like they did at IMATS Los Angeles, however the selection was a bit more limited this round. A look at all the Natasha Denona Blush Duos.

For those curious about what I hauled, here is the loot. I did haul more than I had planned – some of the 30% to 40% off discounts were just too good to pass!

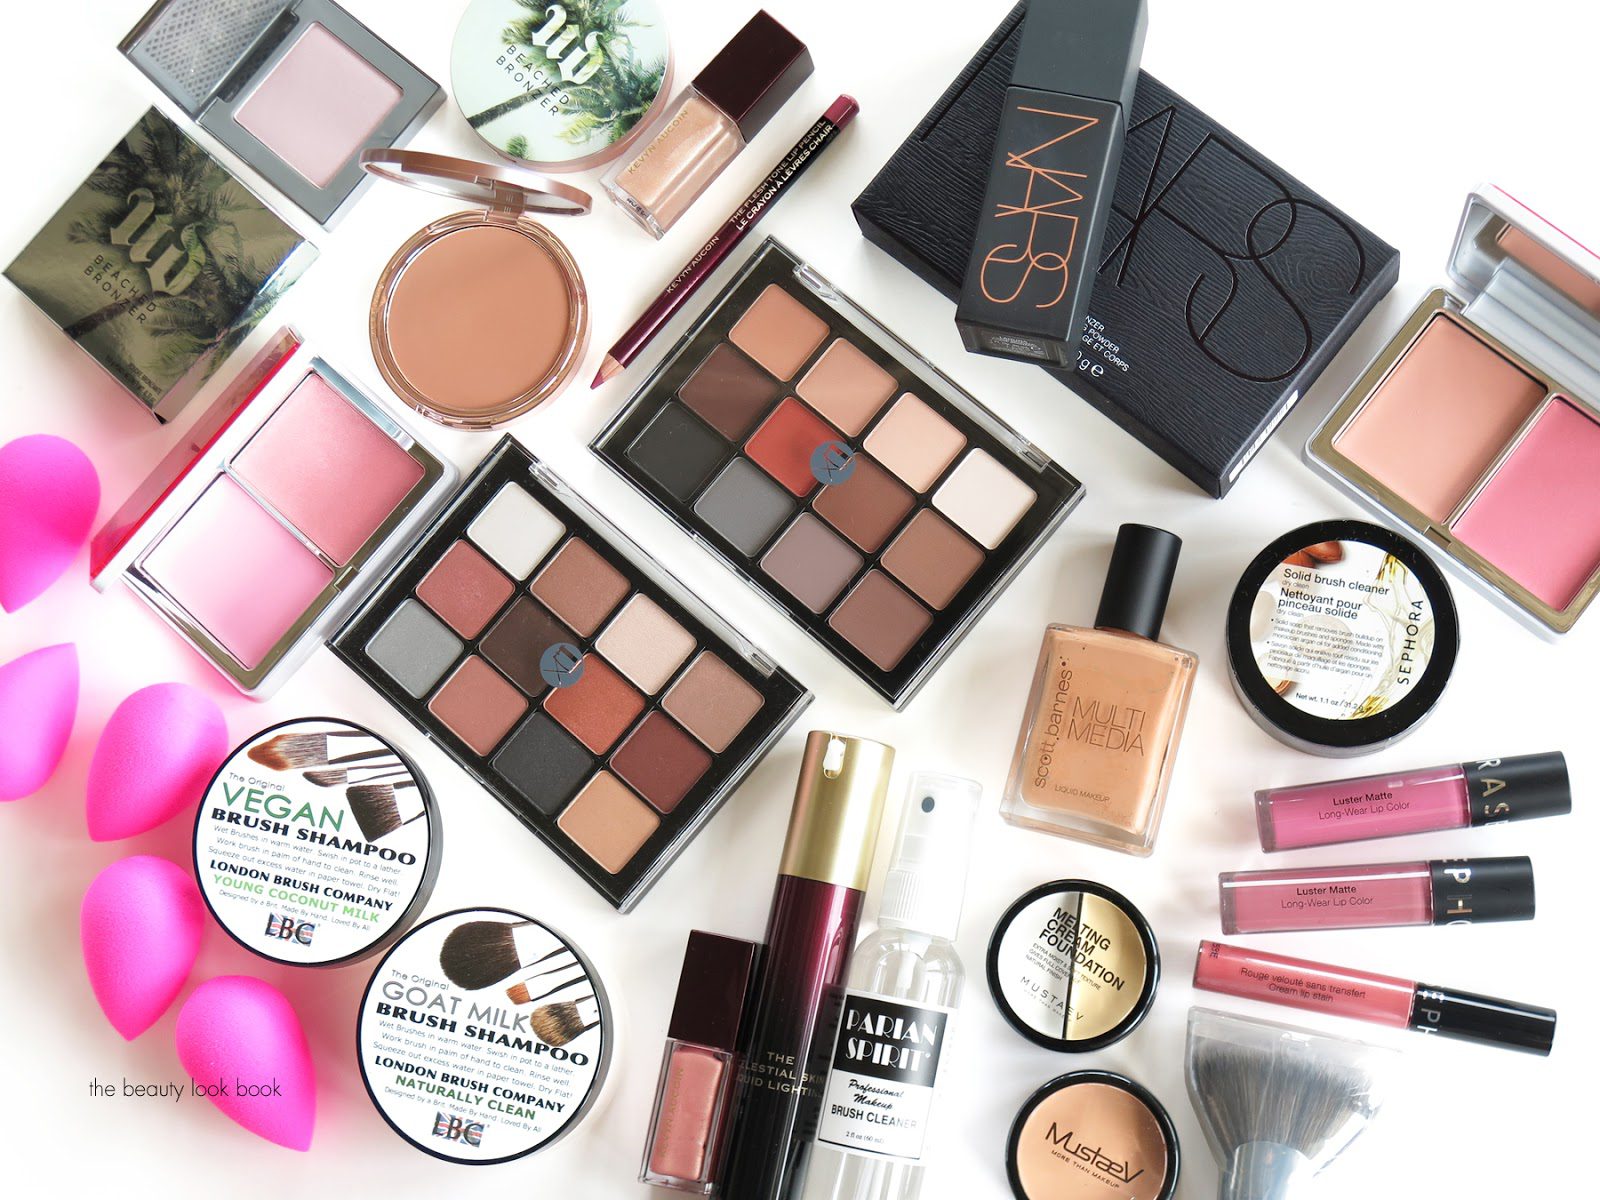
Items shown above listed below, items purchased by me except for a few press samples noted:
I’ll be reviewing items as I work my way through testing them. I did pre-order the new Viseart Palettes at the show and will be swatching as soon as they arrive (estimated ship date is 3/30). I’m always looking to try new brush cleansers so I’m excited to try some of the ones I picked up at the show – I know many of you love baby shampoo, I used to use it, but I feel like these days it just leaves a film on my brushes that I cannot rinse off properly. 

Did you visit The Makeup Show LA last weekend? Or do you have plans to attend on in another city later this year?
Base Makeup Sephora

Color Correcting for Beginners

March 17, 2016

Last week I stopped by Sephora at South Coast Plaza for a Correct and Conceal Mini Makeover to learn more about the color correcting trend happening right now. I was curious to see if there was anything that could cover dark spots and redness better than a full coverage concealer or foundation. I had a session with artist Dre who was one of the most knowledgeable artists I’ve ever worked with. She was very thorough in explaining color correcting, going through all the options and application techniques, gave me awesome skin prep recommendations and I could not have had a more fun experience. If you’re like me you and consider yourself a novice or beginner when it comes to color correction you might be intimidated by the whole concept. I’ll share my makeover experience, what was used, what I bought and some thoughts on the product testing process. I hope this will help give you some tips and ideas of what to try on yourself. If you have a Sephora near you I highly recommend you call them to schedule a mini-makeover. They can be as quick as 15 minutes and I think you will be impressed with how much you learn – I learned a lot. Scheduling one in advance is probably best to make sure they have someone on site to sit down with you although they can accommodate walk ins sometimes and they are free of charge!

First a quick run through of the mini-makeover I had at Sephora. She started by assessing my skin type and skin concerns. I mentioned I had super sensitive skin and told her about a few products I had allergic reactions to. Personal concerns for my skin were to improve texture, cover dark spots from scars that were healing, under-eye darkness and redness in general. I also mentioned that I liked a streamlined easy approach to applying base face makeup so she picked out her four favorite color correcting products for my skin type that would be easy to use and incorporate along with some skincare items for me to try for calming and radiance.

For a bit of background on Color Correcting it’s not a new trend but it has been very popular right now. The concept of color correcting is that you can use certain colors to counter or diffuse others. Green will correct red, peach will help with dark spots and undereye circles, pink and purple will counter dullness and brighten the skintone. I initially thought using a full coverage concealer or foundation would be sufficient but I often find it leaves the face looking a bit flat and sometimes those dark spots still show through. This is where color correcting can help. Here’s a look at the Sephora Beauty Studio in store – it varies per store but most have a station with mirrors, makeup remover and tools for artists to apply product on your face.

A run through of all the products she used on me from start to finish:

Step 1: Prep the skin

She started by having me remove my makeup with the Ole Henriksen The Clean Truth Cleansing Cloths which are super gentle and non-irritating for my sensitive skin. This one cleans, balances and hydrates in one step which is convenient for on-the-go makeup removal. Next she used the First Aid Beauty Radiance Pads to help with surface texture. She followed with the Caudalie Vinoperfect Radiance Serum and Ole Henriksen Nurture Me since I mentioned my face was prone to irritation and flare ups. Skin felt smooth, nicely hydrated and calmed down.

Step 2: Base

Dre’s theory of using color correcting was to use apply in steps and use it with your current foundation routine. She started by applying the Algenist Reveal Concentrated Color Correcting Drops in Blue to help brighten the overall skintone as a base which did indeed brighten the skin without looking scary blue. Blue helps to neutralize sallow skin. She followed with the Make Up For Ever Ultra HD Invisible Cover Stick in 128 mentioning one’s foundation will do a lot of the color correcting as a starting point to neutralize uneven skintone or dark spots.

Step 3: Color Correct

At this point even with a fuller coverage foundation on my skin you can still see dark circles under the eyes and dark spots from acne scars that are healing still show through. Rather than layer on the foundation color correcting helps add coverage without caking on product. I was skeptical but was really impressed with how literally all the dark spots disappeared with a green color corrector and undereye circles disappeared with a peach/melon corrector. She applied the Sephora Collection Bright Futures Color Correctors in Green and Melon. The key here was to apply and let set so that colors don’t get muddied when you blend them wet. For the green she dotted on spots and then blended with a detailed concealer brush in a cross hatch method to help blend and cover naturally. For the melon she applied directly under my eyes in a downward swiping motion and blended with the sponge tip applicator.

Step 4: Conceal, Set and Finish

Once the color correctors have properly set (takes maybe 3 minutes at most, as long as you don’t pile on the creams) finish by taking concealer or foundation and pat it on top. She used the Sephora Collection Pro Foundation Brush #47 which is a more affordable similar version of the Marc Jacobs Beauty Sculpting Foundation Brush to roll and dab on the foundation over the corrected spots gently and then blend everything out gently with a beautyblender. You don’t want to take a sponge or brush and press too hard on the face or else it will drag and mix colors to make it look muddy. The final step she used was to set with a loose powder. She showed me the difference between the Laura Mercier Translucent Loose Powder and also the Besame Brightening Face Powder in Violet (both applied with a puff). She said the Laura Mercier is her favorite (it’s one of mine too) but if I wanted to try something new she recommended the Violet to brighten the skin, for fairer skins she recommended the Pink (which I already own).

Step 5: Add color and makeup

She added a bit of blush and bronzer on my skin so my face wouldn’t look flat from all the base makeup, but I asked her to keep it minimal so I could see how the correctors and foundations performed through the afternoon. We skipped everything else and I was impressed that my makeup lasted well into the late evening without any touchups needed. Her skincare recommendations and application made it so nothing budged or creased or faded. Once I use up some of my moisturizers I will need to buy some of the items she used on me.

I have never been so impressed with a makeup session as I have been with my visit to Sephora. Dre taught me so many things – I really appreciated her taking the time to go through application tips and recommending products specific to my needs. My brother tagged along to help me take photos and afterwards I asked him if he thought my face looked ok. He said yes, it looked natural and he couldn’t tell that there were any weird colors. So it passed the brother test 🙂 In discussing the different color corrector options, I asked her why she recommended the Sephora Collection Color Correctors over the ones from Urban Decay Correcting Fluids or YSL Touche Eclat Neutralizers or even the ones that come in cream compacts. She said it was a matter of preference – the cream palettes can definitely multi-task with all the options for color correction and concealer, but to keep things simple she said the Sephora Collection correctors were her favorite for consistency, texture and coverage. (I bought one each of the Urban Decay and YSL to test against the Sephora Collection and I’ll say right now she was right.)

Next up is a run through review of everything I bought and tried along with a mini tutorial of how I’ve been recreating the color correcting look to diffuse dark spots and dark circles. Here are the items she used on me during the makeover. I bought all the items she tried with the exception of the Violet powder because I already own the Pink although I’m seriously considering going back to the store to pick it up this weekend.

Left to right are:

  • Micro Mini Correct Four by beautyblender – there are some new beautyblender options, for the color correcting trend they launched a set of four in different colors, I really like these for blending under the eyes or in the creases of the nose, it’s nice to have different colors on hand to match the correctors so you don’t have to worry about mixing colors together 
  • Algenist Reveal Concentrated Color Correcting Drops in Blue – you can use these alone or mixed in with foundation to help color correct the skin. I’ve been using this as a base, almost like a primer to help counter my sallow undertones with my olive yellow skin. It brightens the skin without looking too blue. You can even mix it in with moisturizer to blend all over to make it a bit more sheer. I really like the way this performs. 
  • Make Up For Ever Ultra HD Invisible Cover Stick Foundation in 128 (looks dark but blends out to a slightly lighter finish, that being said I am getting lighter right now so I will probably have to purchase a different shade soon to mix) is one of the most amazing foundation sticks I have ever tried (it rivals Tom Ford’s) – I’ll have a separate review in the upcoming weeks once I’ve given it a thorough test drive but it offers medium to full buildable coverage that looks amazing
  • Sephora Collection Bright Future Color Correctors in Green and Melon – After testing this compared to YSL and Urban Decay, I have to say that my favorites for texture and consistency on my face are the Sephora Collection ones, they don’t crease or emphasize fine lines and they have enough coverage and pigment to truly neutralize my face issues, the Urban Decay Naked Skin Color Correcting Fluid in Peach has a similar coverage to the Sephora ones and looks great on the skin but if I don’t have enough primer under my eyes it emphasizes all the fine lines that I don’t want to show up, the YSL by comparison is a lot more sheer in finish and I need more coverage
    • A quick side note, during my make over I mentioned my favorite under eye concealer of the moment was the Make Up For Ever Ultra HD Concealer and that I liked the ones with peachy tones (mainly R32) to warm up and brighten under eyes, Dre did mention that this was also one of her favorites to use, but she showed me the Sephora Collection in Melon for me to try something new
  • Estee Lauder Double Wear Stay In Place Flawless Wear Concealer in Warm Light Medium – she used this to highlight my face and I was so impressed with the coverage and texture I had to try it out – it offers smooth flawless coverage and really does stay in place without caking or creasing through out the day
  • Besame Brightening Face Powder in Vanilla Rose (she used Violet on me in store)
  • Laura Mercier Translucent Loose Powder – I already own this and have repurchased numerous times, it’s one of my favorite loose setting powders, if you haven’t tried it I will say you need to
A simple step by step mini tutorial showing before and after. I took the tips learned at my appointment to recreate a flawless base at home. I hoped to take an after show last week but the store lighting wasn’t ideal. In the first shot I did prep my skin with a thin layer of foundation, but as you can see dark spots and dark circles are still highly visible:

Below are the tools I recommend using, but you can shop your stash and find what works:

A look at packaging and different applicators for each kind of color corrector that I’ve been testing out ranging from droppers, sponge tips, squeeze tubes and click brush applicators:

Side by side swatches of the color correctors and some concealers:

A look at the Sephora Collection Bright Future Color Correctors, note there is also Orange/Deep and Lavender available online but when I was in store they didn’t have those colors yet:

In case you missed the Make Up For Ever Ultra HD Concealer post, here are all the shades swatched:

I hope you enjoyed this overview on color correcting! If you’re a novice like me I hope the rundown of my makeover, all the options I tried and swatches help make the color correcting concept seem less confusing or intimidating. I went into my appointment thinking that there wasn’t going to be much that could be done for my dark spots but I went in with an open mind and learned so much. Sometimes makeovers can be a daunting process especially if you get a pushy artist or one who just doesn’t listen to your needs or who doesn’t care preferences. I really recommend trying to book an appointment at your local Sephora – I am already planning on going back for a second appointment hopefully in the next couple of months because my experience was that good. If you’re in the area of South Coast Plaza try to book one with Dre – she’s awesome. If you can’t make it into the store, there is an online survey on the Sephora Color Correcting Makeup page to guide you and help narrow down the picks according your specific concerns and skin type.

Have you tried color correcting recently or is it something you’ve always done for your base makeup routine? Please let me know what you’ve tried and your thoughts. I always learn new tips and tricks from you and would love to hear about what you have been testing or if you have any favorites.
This post was created in partnership with Sephora. As always all opinions my own. Most products picked out and purchased by me, press samples include the Besame Powder and Make Up For Ever Ultra HD Concealers.