Browsing Tag

Makeover

Base Makeup Sephora

Color Correcting for Beginners

March 17, 2016

Last week I stopped by Sephora at South Coast Plaza for a Correct and Conceal Mini Makeover to learn more about the color correcting trend happening right now. I was curious to see if there was anything that could cover dark spots and redness better than a full coverage concealer or foundation. I had a session with artist Dre who was one of the most knowledgeable artists I’ve ever worked with. She was very thorough in explaining color correcting, going through all the options and application techniques, gave me awesome skin prep recommendations and I could not have had a more fun experience. If you’re like me you and consider yourself a novice or beginner when it comes to color correction you might be intimidated by the whole concept. I’ll share my makeover experience, what was used, what I bought and some thoughts on the product testing process. I hope this will help give you some tips and ideas of what to try on yourself. If you have a Sephora near you I highly recommend you call them to schedule a mini-makeover. They can be as quick as 15 minutes and I think you will be impressed with how much you learn – I learned a lot. Scheduling one in advance is probably best to make sure they have someone on site to sit down with you although they can accommodate walk ins sometimes and they are free of charge!

First a quick run through of the mini-makeover I had at Sephora. She started by assessing my skin type and skin concerns. I mentioned I had super sensitive skin and told her about a few products I had allergic reactions to. Personal concerns for my skin were to improve texture, cover dark spots from scars that were healing, under-eye darkness and redness in general. I also mentioned that I liked a streamlined easy approach to applying base face makeup so she picked out her four favorite color correcting products for my skin type that would be easy to use and incorporate along with some skincare items for me to try for calming and radiance.

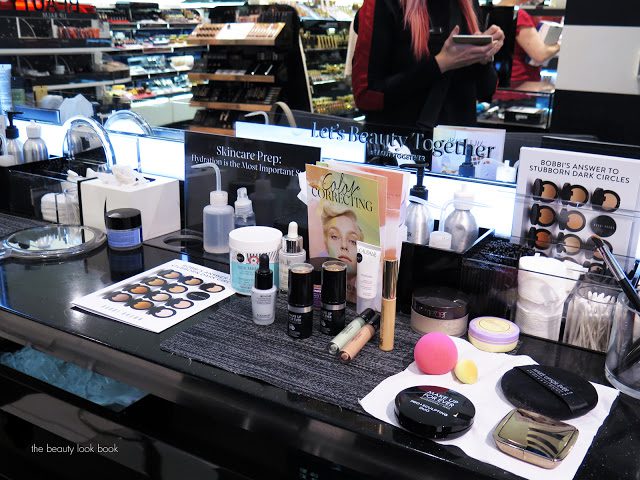
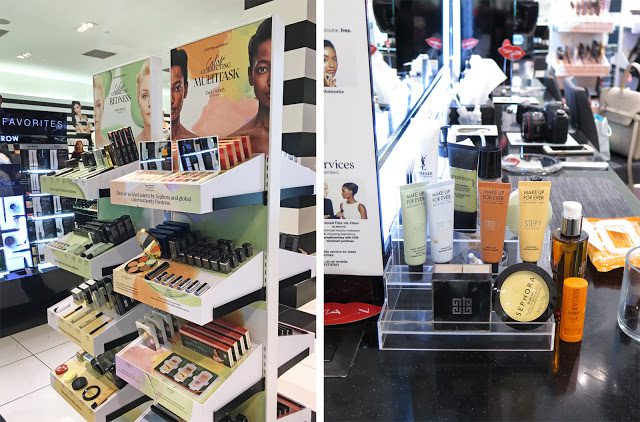
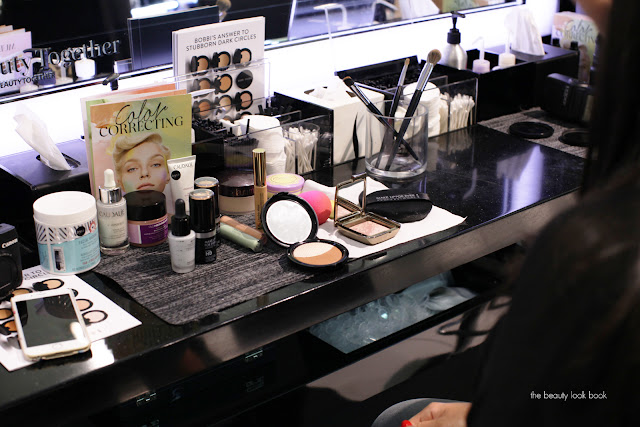
For a bit of background on Color Correcting it’s not a new trend but it has been very popular right now. The concept of color correcting is that you can use certain colors to counter or diffuse others. Green will correct red, peach will help with dark spots and undereye circles, pink and purple will counter dullness and brighten the skintone. I initially thought using a full coverage concealer or foundation would be sufficient but I often find it leaves the face looking a bit flat and sometimes those dark spots still show through. This is where color correcting can help. Here’s a look at the Sephora Beauty Studio in store – it varies per store but most have a station with mirrors, makeup remover and tools for artists to apply product on your face.

A run through of all the products she used on me from start to finish:

Step 1: Prep the skin

She started by having me remove my makeup with the Ole Henriksen The Clean Truth Cleansing Cloths which are super gentle and non-irritating for my sensitive skin. This one cleans, balances and hydrates in one step which is convenient for on-the-go makeup removal. Next she used the First Aid Beauty Radiance Pads to help with surface texture. She followed with the Caudalie Vinoperfect Radiance Serum and Ole Henriksen Nurture Me since I mentioned my face was prone to irritation and flare ups. Skin felt smooth, nicely hydrated and calmed down.

Step 2: Base

Dre’s theory of using color correcting was to use apply in steps and use it with your current foundation routine. She started by applying the Algenist Reveal Concentrated Color Correcting Drops in Blue to help brighten the overall skintone as a base which did indeed brighten the skin without looking scary blue. Blue helps to neutralize sallow skin. She followed with the Make Up For Ever Ultra HD Invisible Cover Stick in 128 mentioning one’s foundation will do a lot of the color correcting as a starting point to neutralize uneven skintone or dark spots.

Step 3: Color Correct

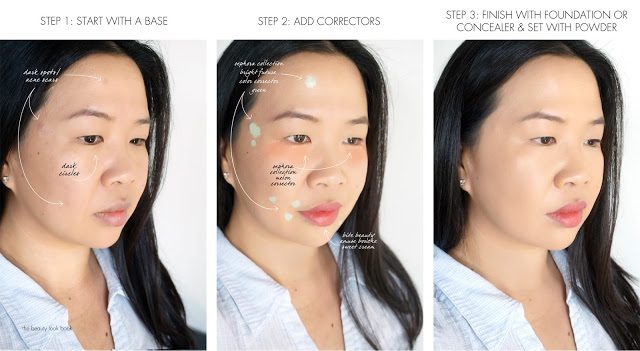
At this point even with a fuller coverage foundation on my skin you can still see dark circles under the eyes and dark spots from acne scars that are healing still show through. Rather than layer on the foundation color correcting helps add coverage without caking on product. I was skeptical but was really impressed with how literally all the dark spots disappeared with a green color corrector and undereye circles disappeared with a peach/melon corrector. She applied the Sephora Collection Bright Futures Color Correctors in Green and Melon. The key here was to apply and let set so that colors don’t get muddied when you blend them wet. For the green she dotted on spots and then blended with a detailed concealer brush in a cross hatch method to help blend and cover naturally. For the melon she applied directly under my eyes in a downward swiping motion and blended with the sponge tip applicator.

Step 4: Conceal, Set and Finish

Once the color correctors have properly set (takes maybe 3 minutes at most, as long as you don’t pile on the creams) finish by taking concealer or foundation and pat it on top. She used the Sephora Collection Pro Foundation Brush #47 which is a more affordable similar version of the Marc Jacobs Beauty Sculpting Foundation Brush to roll and dab on the foundation over the corrected spots gently and then blend everything out gently with a beautyblender. You don’t want to take a sponge or brush and press too hard on the face or else it will drag and mix colors to make it look muddy. The final step she used was to set with a loose powder. She showed me the difference between the Laura Mercier Translucent Loose Powder and also the Besame Brightening Face Powder in Violet (both applied with a puff). She said the Laura Mercier is her favorite (it’s one of mine too) but if I wanted to try something new she recommended the Violet to brighten the skin, for fairer skins she recommended the Pink (which I already own).

Step 5: Add color and makeup

She added a bit of blush and bronzer on my skin so my face wouldn’t look flat from all the base makeup, but I asked her to keep it minimal so I could see how the correctors and foundations performed through the afternoon. We skipped everything else and I was impressed that my makeup lasted well into the late evening without any touchups needed. Her skincare recommendations and application made it so nothing budged or creased or faded. Once I use up some of my moisturizers I will need to buy some of the items she used on me.

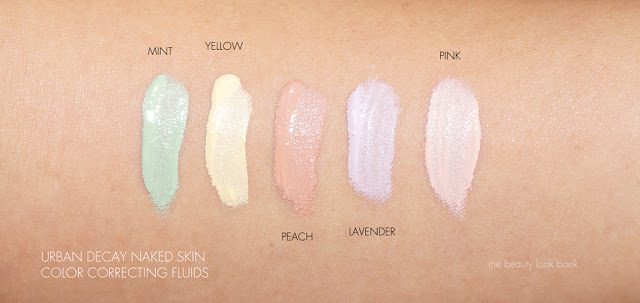
I have never been so impressed with a makeup session as I have been with my visit to Sephora. Dre taught me so many things – I really appreciated her taking the time to go through application tips and recommending products specific to my needs. My brother tagged along to help me take photos and afterwards I asked him if he thought my face looked ok. He said yes, it looked natural and he couldn’t tell that there were any weird colors. So it passed the brother test 🙂 In discussing the different color corrector options, I asked her why she recommended the Sephora Collection Color Correctors over the ones from Urban Decay Correcting Fluids or YSL Touche Eclat Neutralizers or even the ones that come in cream compacts. She said it was a matter of preference – the cream palettes can definitely multi-task with all the options for color correction and concealer, but to keep things simple she said the Sephora Collection correctors were her favorite for consistency, texture and coverage. (I bought one each of the Urban Decay and YSL to test against the Sephora Collection and I’ll say right now she was right.)

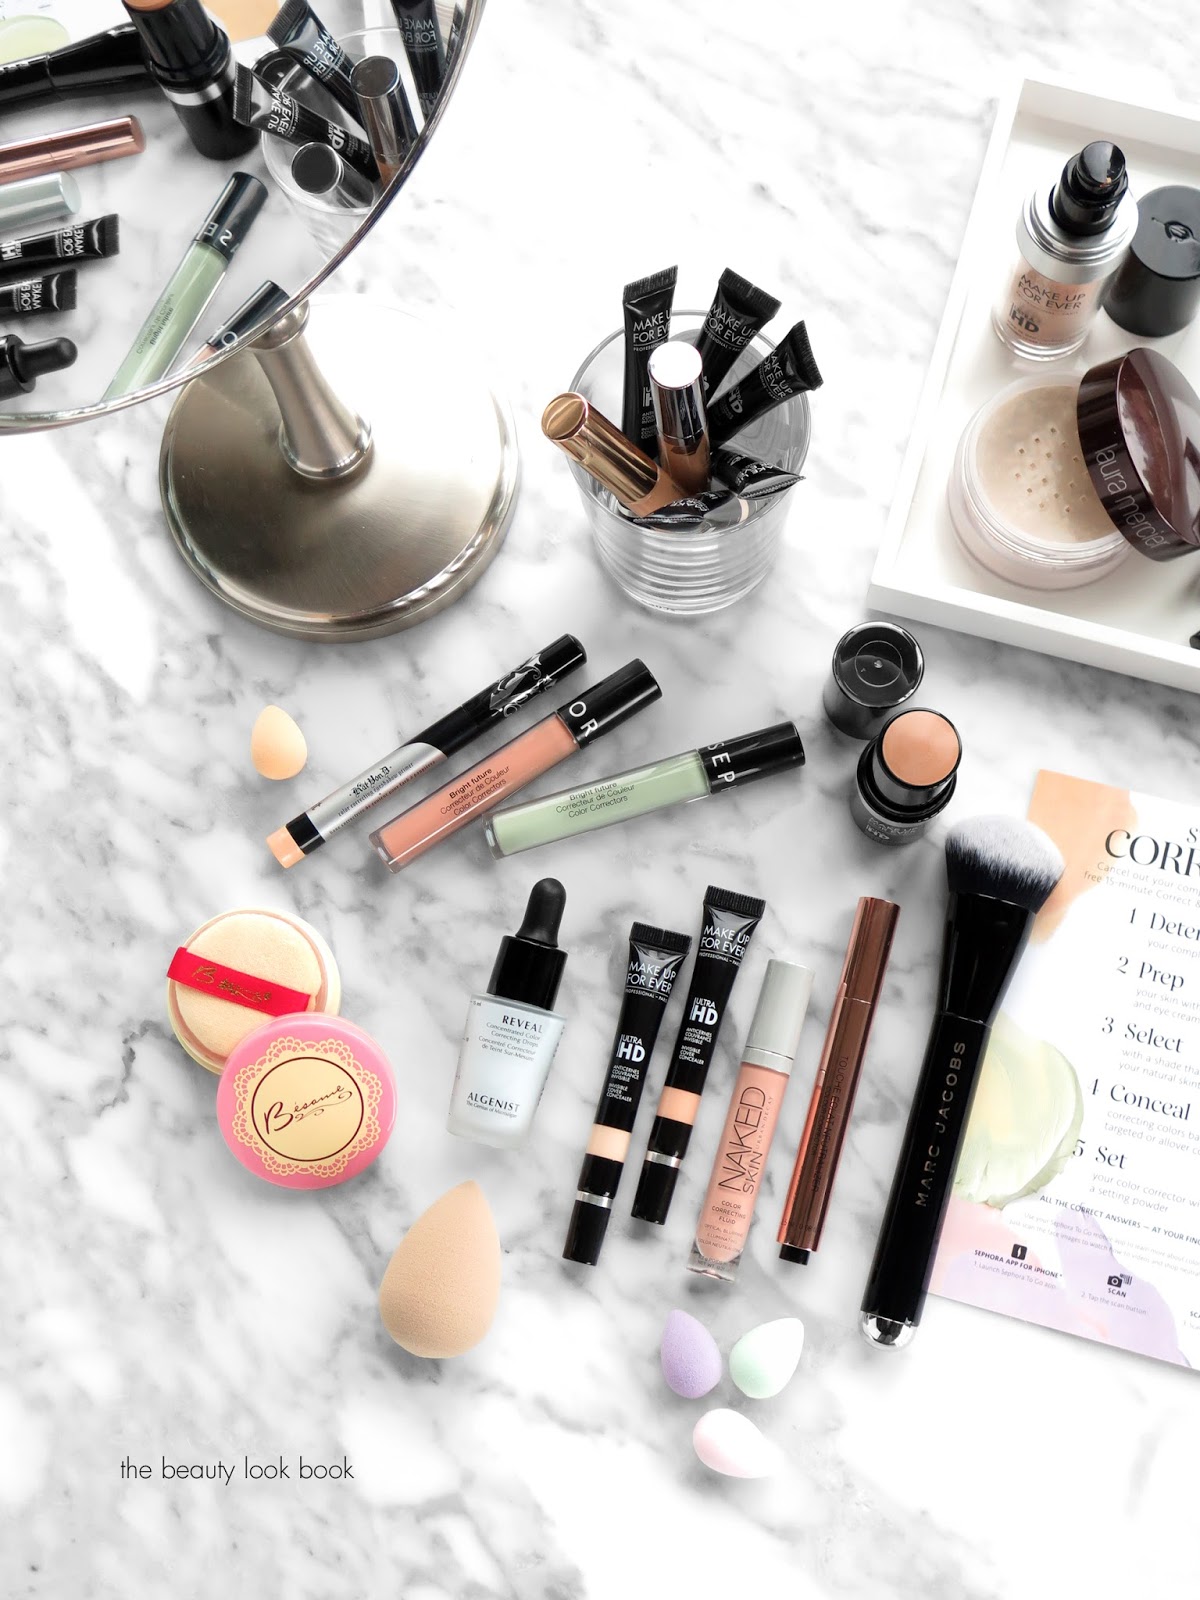
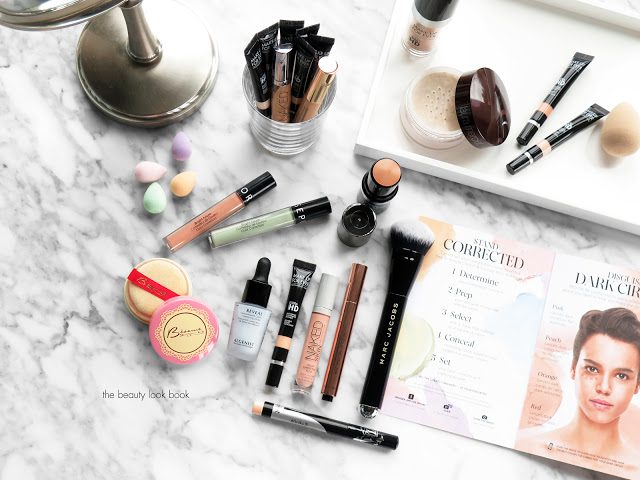
Next up is a run through review of everything I bought and tried along with a mini tutorial of how I’ve been recreating the color correcting look to diffuse dark spots and dark circles. Here are the items she used on me during the makeover. I bought all the items she tried with the exception of the Violet powder because I already own the Pink although I’m seriously considering going back to the store to pick it up this weekend.

Left to right are:

  • Micro Mini Correct Four by beautyblender – there are some new beautyblender options, for the color correcting trend they launched a set of four in different colors, I really like these for blending under the eyes or in the creases of the nose, it’s nice to have different colors on hand to match the correctors so you don’t have to worry about mixing colors together 
  • Algenist Reveal Concentrated Color Correcting Drops in Blue – you can use these alone or mixed in with foundation to help color correct the skin. I’ve been using this as a base, almost like a primer to help counter my sallow undertones with my olive yellow skin. It brightens the skin without looking too blue. You can even mix it in with moisturizer to blend all over to make it a bit more sheer. I really like the way this performs. 
  • Make Up For Ever Ultra HD Invisible Cover Stick Foundation in 128 (looks dark but blends out to a slightly lighter finish, that being said I am getting lighter right now so I will probably have to purchase a different shade soon to mix) is one of the most amazing foundation sticks I have ever tried (it rivals Tom Ford’s) – I’ll have a separate review in the upcoming weeks once I’ve given it a thorough test drive but it offers medium to full buildable coverage that looks amazing
  • Sephora Collection Bright Future Color Correctors in Green and Melon – After testing this compared to YSL and Urban Decay, I have to say that my favorites for texture and consistency on my face are the Sephora Collection ones, they don’t crease or emphasize fine lines and they have enough coverage and pigment to truly neutralize my face issues, the Urban Decay Naked Skin Color Correcting Fluid in Peach has a similar coverage to the Sephora ones and looks great on the skin but if I don’t have enough primer under my eyes it emphasizes all the fine lines that I don’t want to show up, the YSL by comparison is a lot more sheer in finish and I need more coverage
    • A quick side note, during my make over I mentioned my favorite under eye concealer of the moment was the Make Up For Ever Ultra HD Concealer and that I liked the ones with peachy tones (mainly R32) to warm up and brighten under eyes, Dre did mention that this was also one of her favorites to use, but she showed me the Sephora Collection in Melon for me to try something new
  • Estee Lauder Double Wear Stay In Place Flawless Wear Concealer in Warm Light Medium – she used this to highlight my face and I was so impressed with the coverage and texture I had to try it out – it offers smooth flawless coverage and really does stay in place without caking or creasing through out the day
  • Besame Brightening Face Powder in Vanilla Rose (she used Violet on me in store)
  • Laura Mercier Translucent Loose Powder – I already own this and have repurchased numerous times, it’s one of my favorite loose setting powders, if you haven’t tried it I will say you need to
A simple step by step mini tutorial showing before and after. I took the tips learned at my appointment to recreate a flawless base at home. I hoped to take an after show last week but the store lighting wasn’t ideal. In the first shot I did prep my skin with a thin layer of foundation, but as you can see dark spots and dark circles are still highly visible:

Below are the tools I recommend using, but you can shop your stash and find what works:

A look at packaging and different applicators for each kind of color corrector that I’ve been testing out ranging from droppers, sponge tips, squeeze tubes and click brush applicators:

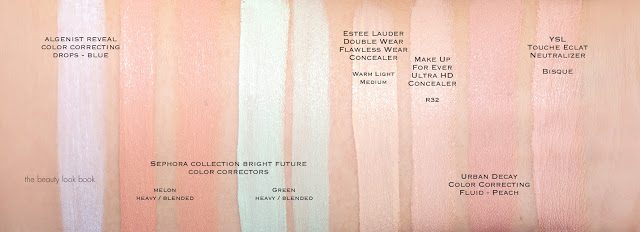
Side by side swatches of the color correctors and some concealers:

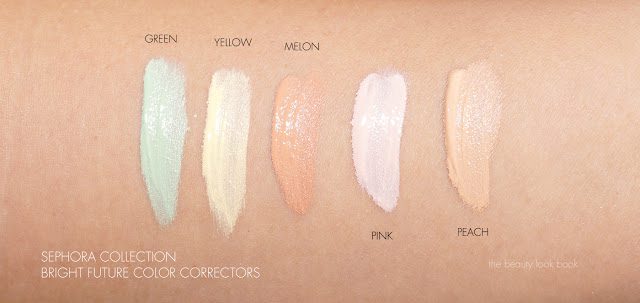
A look at the Sephora Collection Bright Future Color Correctors, note there is also Orange/Deep and Lavender available online but when I was in store they didn’t have those colors yet:

In case you missed the Make Up For Ever Ultra HD Concealer post, here are all the shades swatched:

I hope you enjoyed this overview on color correcting! If you’re a novice like me I hope the rundown of my makeover, all the options I tried and swatches help make the color correcting concept seem less confusing or intimidating. I went into my appointment thinking that there wasn’t going to be much that could be done for my dark spots but I went in with an open mind and learned so much. Sometimes makeovers can be a daunting process especially if you get a pushy artist or one who just doesn’t listen to your needs or who doesn’t care preferences. I really recommend trying to book an appointment at your local Sephora – I am already planning on going back for a second appointment hopefully in the next couple of months because my experience was that good. If you’re in the area of South Coast Plaza try to book one with Dre – she’s awesome. If you can’t make it into the store, there is an online survey on the Sephora Color Correcting Makeup page to guide you and help narrow down the picks according your specific concerns and skin type.

Have you tried color correcting recently or is it something you’ve always done for your base makeup routine? Please let me know what you’ve tried and your thoughts. I always learn new tips and tricks from you and would love to hear about what you have been testing or if you have any favorites.
This post was created in partnership with Sephora. As always all opinions my own. Most products picked out and purchased by me, press samples include the Besame Powder and Make Up For Ever Ultra HD Concealers.

Uncategorized

Chanel Makeover – Escape to Venice Event

July 19, 2013
Affiliate Links        

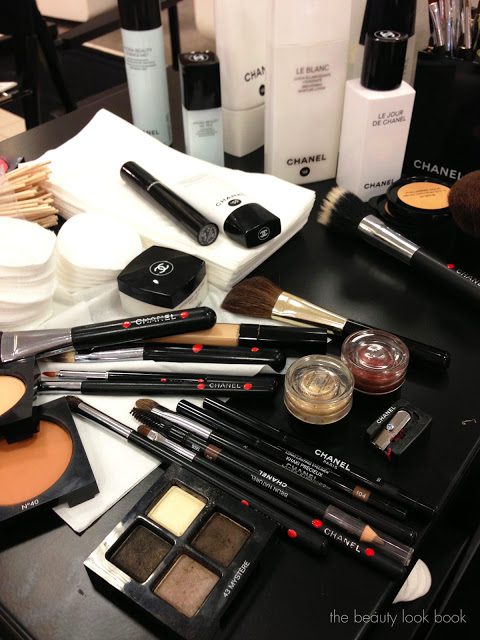
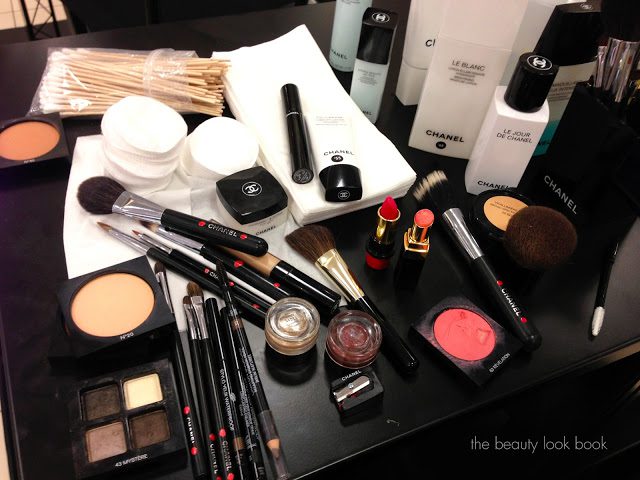
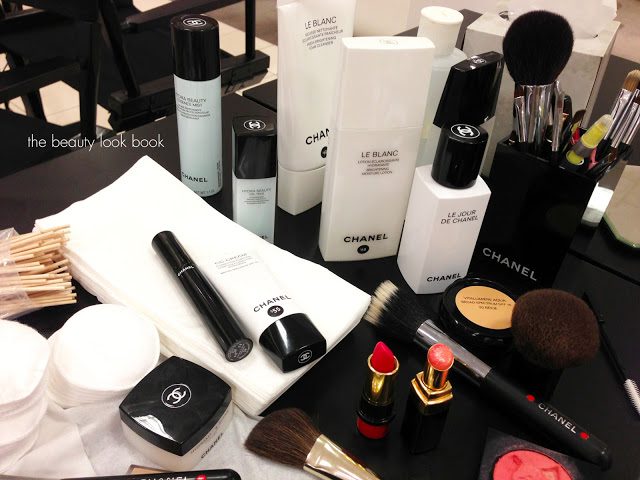
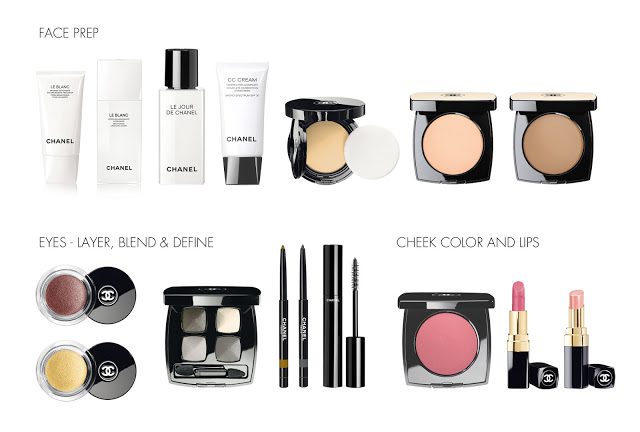
I had a makeover with Chanel at my local Nordstrom for their Escape to Venice event. It was focused around some repromoted items such as the Blue Satin and Beige Nail Polish, Vitalumière Aqua foundation and some Rouge Coco Shines (no new colors or items). I went in to replenish foundation – Chanel makes my favorites. They are one of the few lines I can wear almost any foundation or powder with a good color match, long wear and no irritation/breakouts. They had the Les Beiges powders on display for pre-sale only. I was happy to be able to test those out in person before committing to buy online. (Was also happy to see they won’t be an online exclusive.) Breakdown of what was used on me below.

Items used throughout the makeover:

Face Prep: Cleansed with cotton pads and the Le Blanc Fresh Brightening Cleansing Foam, toned with Le Blanc Brightening Moisture Lotion (really a toner), prepped with the new Le Jour de Chanel. I loved the feel of each item. I was already well stocked on cleanser and toner so I did not purchase either. I have fallen in love with the Le Jour de Chanel samples I received so I went into the event knowing I wanted to purchase the full size. (Detailed skincare review to come shortly.)
Primer and Foundation Makeup: Light application of the CC Cream B20 with the Foundation Brush (nice evening effect but too pale for my taste). Vitalumière Aqua Compact Foundation in B30 buffed with their Kabuki Brush gave an airbrushed natural look. Dusting of Les Beiges 20 all over the face was applied. Last face prep step was to use Les Beiges 40 as a contouring powder.
Eyes: The artist used a lot of layering on the eyes. She started with Illusion d’Ombre in Ebloui all over the bottom half of the lids applied with the Concealer Brush and blended with the fingers. She then followed with the mauve-taupe shade from Mystère Quad on top with a softer fluffy brush. Next she took Apparition Illusion d’Ombre and layered it on top – this achieved a stunning sparkly brown-gold effect when all mixed together. She then used Ebene Stylo Yeux to line the water lines and define the upper lashline. Khaki Precieux was used along the lower lashes to make the eyes pop. The darkest shade from Mystère was used to follow along the lines just in the outer corners and blended softly. Finishing touch was the new Volume de Chanel in Khaki.
Lips and Cheeks: For cheeks she used the Revelation Blush Creme layered with the Les Beiges in 40 for blending/contour. Lips were mixed with a vibrant coral pink Rouge Coco Le Basier 54 and Rouge Coco Shine in Interlude. Both shades were mixed with a lip brush then applied. She blotted the lips and then reapplied the Rouge Coco Shine to soften the look.

The overall look was glowy and just beautiful. I loved the combination for the eyes and the pink lips and cheeks balanced the whole look quite well. The Le Blanc skincare line felt nice on the skin but I’ve never had much luck with the Chanel skincare lines (since Age Delay was discontinued about a decade ago). The Resynchonizing Trio has worked wonders for my skin though (more to come soon). Most of the items used were things I already owned which was nice. The artist took care to take note of what I already own to show me some ideas on how to coordinate the items.

Some new items mixed in with some classics:

Have you had a Chanel makeover recently? Thoughts? Ideas? I will update the post later with more product photos. I’m looking forward to the release of Les Beiges in the US! Nordstrom fans – check your local counters to see if they have events or gifts going on now, many counters are doing promotions in store now.
Follow the beauty look book via Twitter | Instagram | Bloglovin
Uncategorized

Nordstrom Trend Show NARS Makeover (edited)

June 3, 2012
This past weekend I attended a Nordstrom Trend Show with my sister. It’s been a few years since my last trend show (this was my sister’s first). For this particular event, I was particularly excited about our NARS makeovers, hoping to learn new tips and tricks from the NARS specialists on how to mix and match various shades from one of our favorite brands. My sister and I both have loved NARS since our college days.

For this makeover, I asked for a smokey-eye look incorporating NARS Cordura Duo. The artist decided to go in a different direction focusing on other items, but did incorporate a tiny bit of the bronze/golden side of Cordura. The colors she used created a nice palette, but the application wasn’t flattering and I looked like I had punched eyes. The final result wasn’t one of the best I’ve had. My sister confirmed so right after with a discrete shake of her head. (It’s always good to bring a trusted friend with you to these events to tell give you an honest assessment.) I immediately ran to another counter to wipe off the eye makeup. I did get some new ideas on colors to coordinate but revised/edited the look as soon as I got home. Below is the edited version of my makeover. I’ll indicate what was originally used as well for inquiring minds.

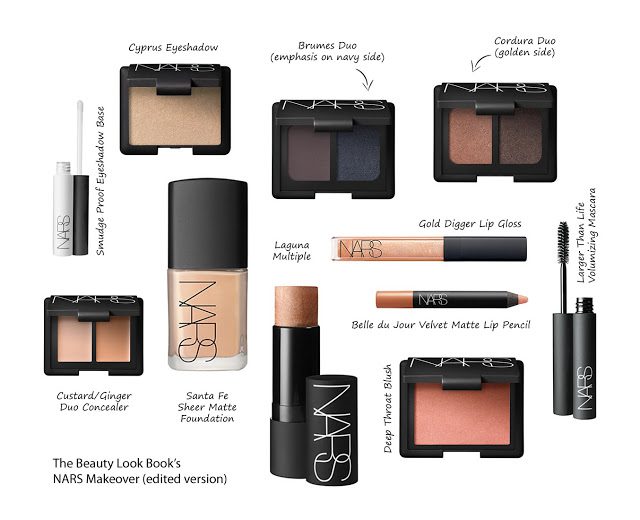
Personally Edited Version List of Products Used

Face:

  • Sheer Matte Foundation in Santa Fe (testing a sample of this color)
  • Duo Concealer in Custard/Ginger
  • Loose Powder in Eden (I substituted my own powder at home)

Cheeks:

  • The Multiple in Laguna
  • Powder Blush in Deep Throat

Eyes:

  • Smudge Proof Eyeshadow Base (giving this a second try with a sample)
  • Shimmer Eyeshadow in Cyprus (applied all over lid)
  • Eyeshadow Duo in Brumes (dark navy smudged along lash line, then smoked upwards slightly, a tiny bit of the gray side mixed in at the end to darken/define)
  • Eyeshadow Duo in Cordura (golden shade, applied with a fluffy brush blended on top of the navy, mixing/blending it to diffuse harsh edges)
  • Larger than Life Mascara (my current favorite mascara)

Lips:

  • Velvet Matte Lip Pencil Belle du Jour
  • Larger Than Life Lip Gloss Gold Digger

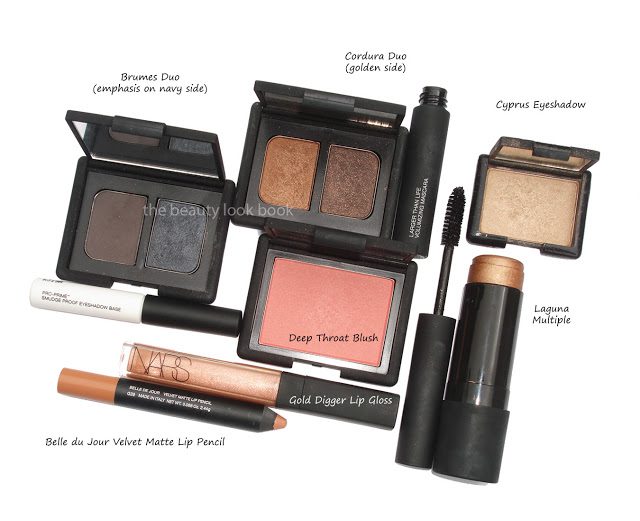
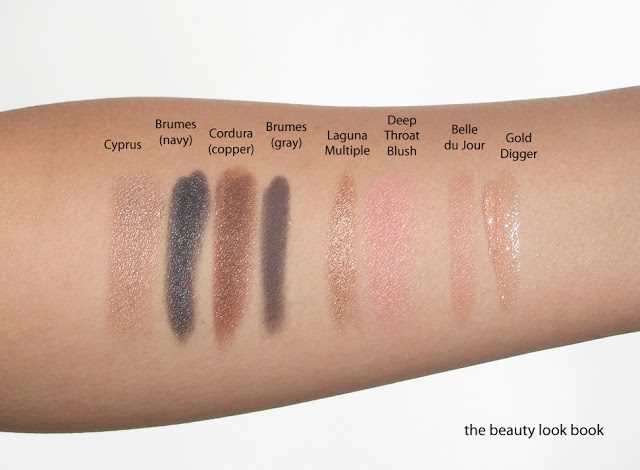
The products I used, more photos and swatches:

 Original Makeover Version 
(not photographed/swatched, you can see that the look was only slightly adjusted)
  • Cheeks:
    • The Multiple in Laguna
    • Powder Blush in Lovejoy (I think this combo will look better with a softer eye)
  • Eyes:
    • Smudge Proof Eyeshadow Base
    • Shimmer Eyeshadow in Cyprus (applied on inner corners blended to the 1/2 way point of lid)
    • Larger Than Life Eyeliner in Rue Saint-Honoré (applied in a
      winged cat liner way, blended up, found the pencil too harsh to be used
      as a blended eyeshadow)
    • Eyeshadow Duo in Cordura (golden side, applied on outer corners
      and blended in for a fake crease, not flattering for Asians without
      creases)
  • Lips:
    • Pure Sheer SPF Lip Treatment in Paloma (so sheer it didn’t show up)
    • Larger Than Life Lipgloss in Pirée (also sheer, sometimes sheer+sheer=meh)

If you haven’t been to a Nordstrom Trend Show, I suggest you do attend if you get a chance. What to expect? high-energy speakers, brightly lit runways with models, mini talks from brand specialists/artists, giveaways, cheering pumped-up women. All what seem like the perfect ingredients for a successful event. I’ve enjoyed
many of them in the past, especially ones with special guest appearances like Deborah Lippmann (that one was so awesome!). My experience this particular time was luke-warm at best. It all seemed like one hard-sell after
another. Each speaker claimed to have the “best in industry” miracle-type of products. I do appreciate the efforts to teach/expose as many brands, trends and skincare items as possible in a short period of time, but I felt the two hours lacked substance. There was too much covered without focus. I left feeling like I didn’t learn as much as I
had hoped to.

In general, I have liked Nordstrom Trend Shows. Nordstrom is indeed at the top among retailers for having best in class customer service. Trend Shows offer an excellent environment to generate buzz, have fun with friends, learn new tricks and makeup tips and brands etc. However I feel that the sheer volume in the number of women that attend, overbooked “makeover” appointments, hard-sell gimmicks etc. water down the quality of customer focus. Bottom line, in the future I’ll look for smaller events to attend with trained national artists (versus free-lance artists who in my experience have mixed levels of talent) or make an appointment with my favorite specialist/counter manager with specific brands for a better result.

Have you had a recent NARS makeover or attended a Trend Show event? What were your thoughts? Experiences?
Uncategorized

Chanel Rouge Coco Shine Launch Event at Nordstrom

April 10, 2011

Various Chanel Nordstrom counters all over the country have been having a special launch event for the Rouge Coco Shine lipsticks. I love Chanel events because I always leave with great tips, tricks and ideas on how to use new and existing shades.

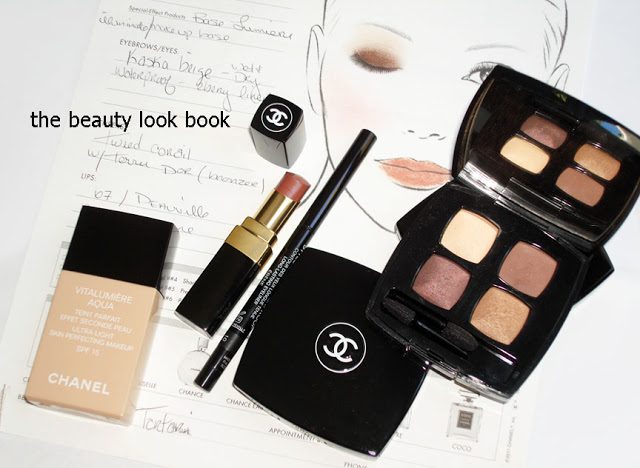
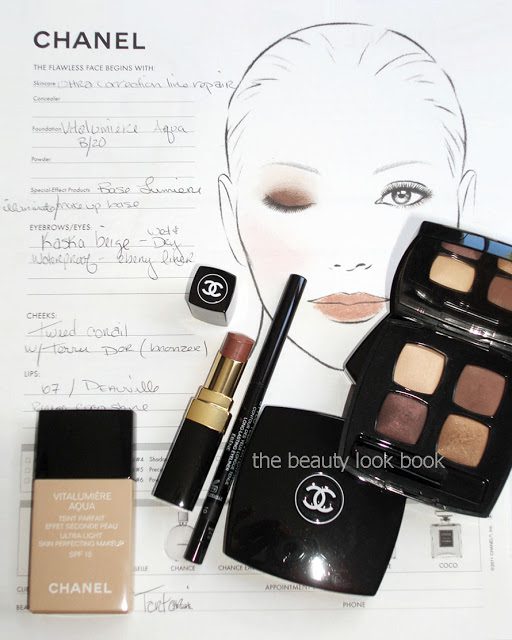
Today the artist asked me what kind of look I was interested in. It helps to give the artist some direction so they know where to start. They almost always like to try new colors on you (“new” as in don’t own yet) but since I have virtually all the Chanel quads she decided to use Kaska Beige to show me how to do a subtle smoky eye. The face chart of what she used:

Skin and Face:
Ultra Correction Line Repair Fluid SPF 15
Base Lumière Illuminating Makeup Base
Vitalumière Aqua in B20 (see swatches here)

Eyes:
Concealer as a base (didn’t note which one)
Kaska Beige Quadra Eyeshadow
Ébène Stylo Yeux Waterproof (pure black)

Cheeks:

Terre D’or Soleil de Tan Bronzer (soft bronze)
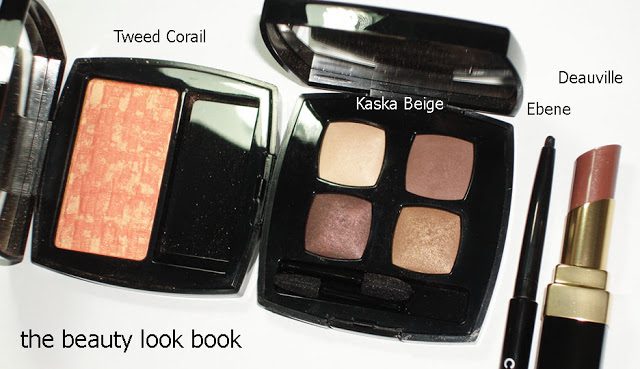
Tweed Corail Bronzer (coral & peach blend also shown here and here)

Lips:

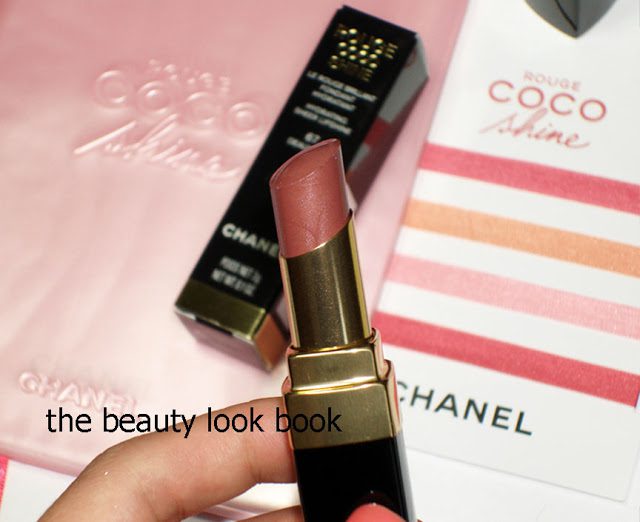
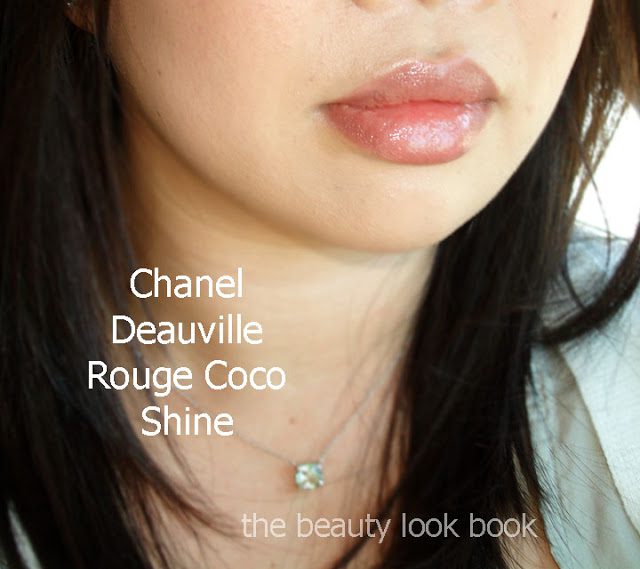
Deauville Rouge Coco Shine Lipstick (pinky-mauve-brown)


The look was subtle but polished. I loved how she did the eyes. In my experience, few artists know how to do Asian eyes without creases. What she did with Kaska Beige:

  • Step 1: Apply a concealer base to even the eye
  • Step 2: Dampen a small eyeshadow brush and apply the darkest plum shade on the eyes from the center of the eye outwards to the outer corners (in a smudgey messy way), it was applied about 1/3 up the bottom lid from the center out
  • Step 3: Take a new clean soft eyeshadow brush and apply the warm brown shimmer all over the plum and all over the lid and blend together
  • Step 4: Apply the upper right cocoa color in outer corners and under the eyes for extra definition
  • Step 5: Line with a black liner along upper lashes
  • Step 6: Take the light cream shell color and dip another clean detail brush and swipe from brow bone downwards for a soft highlight
Blending the golden brown shade over the darker plum was pure genius. The cheeks and lips went perfectly with Kaska Beige.

*Update* Several of my readers have asked for more thoughts on Tweed Corail – I personally love all the tweed blushes. I’ve linked prior features here and here. It gives a lovely soft peach glow that brightens the face with a refined slight shimmer.

For the lips, Rouge Coco Shine in Deauville is a lovely mauve-brown with pink. It’s a complex color in the tube with different shimmers but applies with a lovely glow. It looks different depending on the light angles. I thought it might be too brown from what I saw in the tube but on the lips it looked more pinky-mauve. Another view below, see how it’s more pinkish compared to the views the above photos (because of the lighting/angle). The texture is sheer and glossy. More thoughts on Rouge Coco Shines soon.


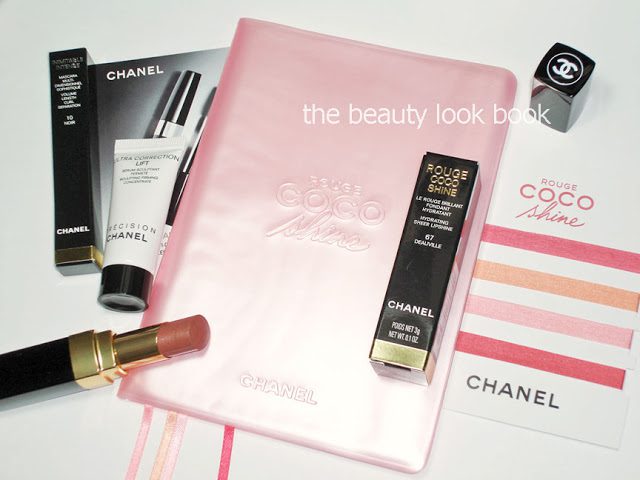
As a promotion, the counter gave out mini pink notebooks, a mini mascara and mini skincare item (shown in the first photo at the beginning of this post). For additional Chanel Makeover Features, click on the MAKEOVER tag at the bottom.

Have you attended any Chanel events? What Rouge Coco Shines have you tried? If you went to an event this weekend, please share the details! I’d love to hear what they used on you or what kind of look they put together for you 🙂

Uncategorized

Chanel Fall 2010 National Artist Event

July 10, 2010
The Nordstrom near me recently had a National Artist Event for Chanel and they used a mix of the new fall 2010 shades with a couple other items from the regular line. There were two different artists who worked with me. Typically with the National Artist events one makeup artist from the Chanel team will cleanse and prep the skin with moisturizers, primers, foundation, concealer and powder. Once the face is prepped, then the National Artist will come by to apply the makeup and work their magic. I would say about 1/2 the events I’ve been to, the National Artist has been able to do my makeup. The other 1/2 were so busy the artist never made it to my chair (in that case one of the regular artists will do your makeup).

I brought in a photo of one of the latest Burberry Beauty ads and asked them to recreate the look using Chanel products. The final result didn’t really resemble the look but I was still pleased with the look and the items they picked out.

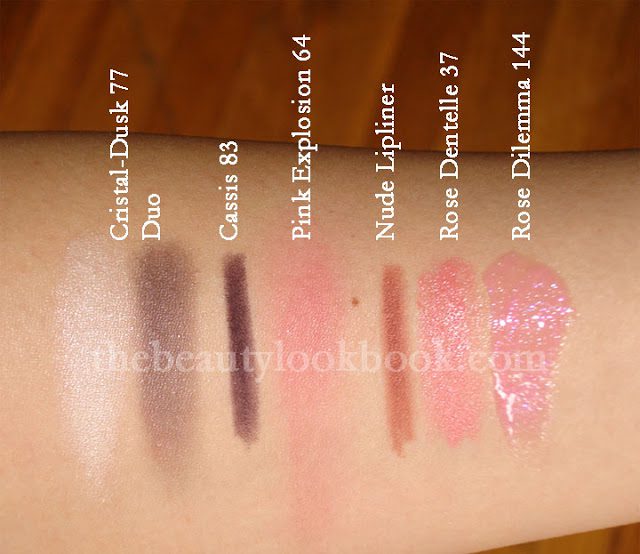
Face:
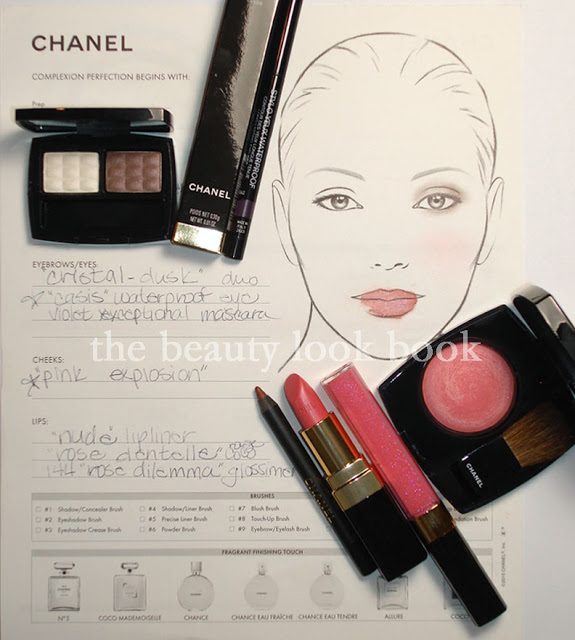
Teint Innocence Compact in Shell 30
Poudre Universelle Libre in Naturel 30
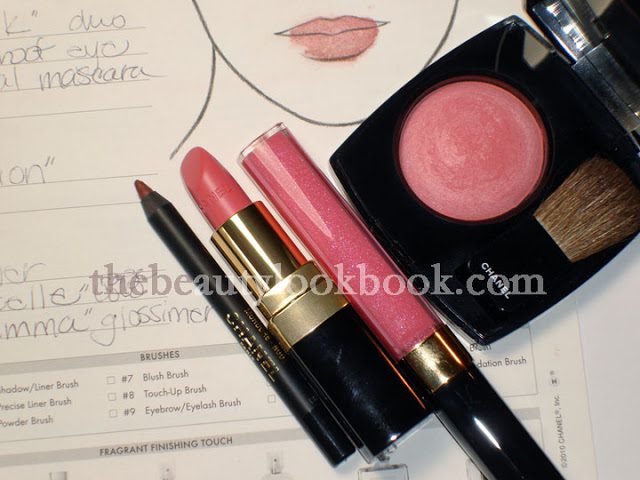
Pink Explosion 64 Blush

Eyes:
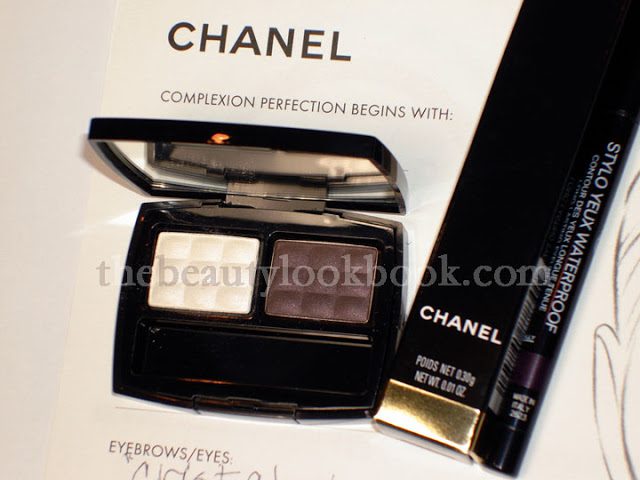
Cristal-Dusk 77 Irreelle Duo
Cassis 83 Stylo Yeux Waterproof
Smoky Violine Exceptionnel Mascara

Lips:
Nude Lipliner
Rose Dentelle 37 Rouge Coco
Rose Dilemma 144 Glossimer

Products are linked to the Chanel & Nordstrom websites for your convenience in case you want to read more about the products through their descriptions, check prices, see other color options etc.

Cristal-Dusk Duo + Cassis Eyeliner

L to R: Nude Lipliner, Rose Dentelle Rouge Coco,
Rose Dilemma Glossimer, Pink Explosion Blush


  • Skin: Skin was cleansed and then prepped with the Ultra Correction Lift line. For the skin the focus was on preventing the effects of aging. Looking at my skin, they said they thought I would have the type of skin that would sag instead of wrinkle as I aged. I’m not sure which one is better, lol. They used the Sculpting Firming Concentrate, Lifing Firming Day Fluid, and the Total Eye Life Eye Cream. I’ve never really liked Chanel skincare (except their Age Delay line which has long been discontinued) but they gave me samples to try.
  • Face: The artist who prepped my skin had done my makeup before on numerous occasions, so she used my regular foundation in Teint Innocence in Shell 30. I asked to try the loose powder, and she applied the Poudre Universelle Libre in Naturel 30. I was surprised no concealer was used since they almost always push their concealers during these events. However, the Teint Innocence Compact Foundation is a heavier coverage foundation on my skin, so perhaps that is why they skipped it (much to my delight).
  • Cheeks: This is where the National Artist stepped in and picked out Pink Explosion 64 Joues Contraste (previously reviewed here). Much to his surprise, I mentioned that I noticed the formulas for the fall collection were different and came in the baked formula like the European and Asian releases. His face just lit up as he said, “I’m so proud you know that, half of these ladies (waved his hand at the team) don’t even know that and they should.” I asked if he by chance knew if they were going to change the formula going forward. He wasn’t sure but thought it would be for certain collections only, not all, but couldn’t confirm.

Close up of the lips, but this is a few hours after the event so it’s a bit faded. Also within a few hours, my skin felt extremely greasy despite the cloudy-cool and slightly windy weather we’ve been having here in Southern California. I think the skincare items I tried will be a no-go. I hate to admit this, but for the eyes, I took the makeup off as soon as I got home. I liked the colors they used, they just applied way too much. Even my husband asked, “why do you have so much makeup on today?”

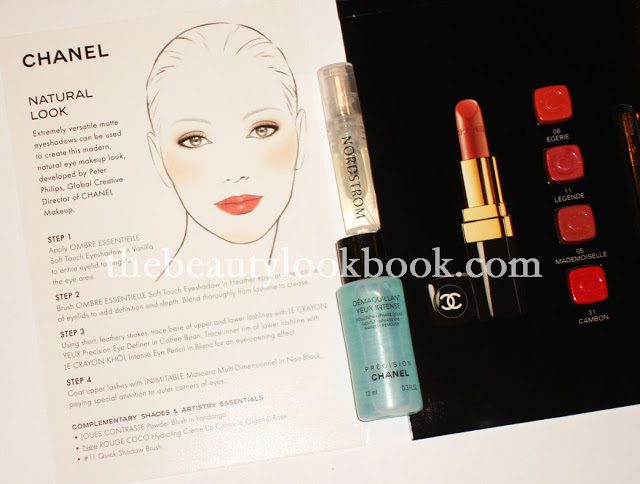
There wasn’t a gift with purchase offered. I feel this is sometimes better because then there is less pressure to spend a lot of money. They did however give out samples to everyone who attended: A mini look-card, mini perfume sample, eyemakeup remover, Rouge Coco sample card.

Those new to my blog, you can click the “Makeover” tag below to see other products used at past events I’ve attended (including Chanel, MAC and NARS). My last one from Chanel was back in March (click here).
Uncategorized

Rain or Shine, I’m Hopelessly Addicted to NARS

January 23, 2010

It’s been pouring down rain and hail here for several days, but I signed up for a NARS event and was determined to go no matter what the weather conditions were.

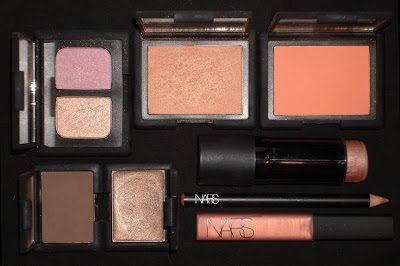
My local Nordstrom hosted a 3 day NARS national artist event to launch the spring line and I was thrilled with the makeover results. I asked the makeup artist for a look that would either use the new Kuala Lumpur Eyeshadow Duo or if that didn’t work, I asked for ideas on how to use my Brousse Eyeshadow Duo with the new Ophelia Lipgloss.

We decided to try the new spring duo since she was smitten with it, but unfortunately it was just too warm for my skintone. It looked like a combination of MAC Melon Pigment + Starviolet Eyeshadow on my eyes. I loved the fact that she was so easy to work with and did not hesitate to take the eyeshadows off and start over again. This is what she ended up doing:


Skin Prep: Skin was cleansed with the Makeup Cleansing Oil (applied to dry skin) and wiped off with a water-sprayed cotton pad. She then used the Balancing Toning Lotion to tone the skin and applied the Potent EFA Cream, Nourishing Eye Cream, and Makeup Primer.

Foundation & Concealer: She used the South Beach Multiple on the cheeks and temples under foundation to give the skin a glow from within. Since I already use the Sheer Glow, I asked to try out the Sheer Matte, she picked out Sheer Matte in Santa Fe which seemed to be a good match. Red spots and dark circles were covered with the Custard/Ginger concealer duo mixed with Luxor Multiple for a luminous uplifting glow. The Powder Foundation in Deauville was buffed out on the skin.

Cheeks: For cheeks, I mentioned to her that I already had almost every single Nars Blush, so she of course asked which shades I did not have, and picked out Taj Mahal for me to try. I have to admit I was seriously freaked out when I saw it, but she applied it with a VERY soft touch followed by Desire and it gave THE PERFECT glowy peachy pink I have ever seen. The way she applied Taj Mahal was to take their Yachiyo Brush and dust it into the compact then she vigorously tapped off the excess. She applied it to the cheeks in a soft sweep and it gave a subtle candle-lit glow. She then used the same brush to apply Desire right over it.

Eyes: An interesting trick she showed me was to apply the Luxor Multiple with a concealer brush right above the brows to give an uplifting-effect. For the eyes, she started by lining the eyes with Aigle Noir Soft Touch Shadow Pencil and smudged it. Mekong Single Eyeshadow was then applied with a smudge brush right on top of the pencil and then blended upwards with a mixture of both sides from Brousse Eyeshadow Duo about 1/2 way up the lids. Next, she took the lighter side of Kalahari Eyeshadow Duo to go over all the shades as a blending and softening color with soft contour. For mascara, she used both of the new ones in black, starting with the Lengthening first, and then the Volumizing on top. It was an instant lash makeover.

Lips: For lips, she blotted the lips with Cafe Con Leche Velvet Matte Lip Pencil (which I have but is missing-in-action) and topped with an application of Belle du Jour Lipstick. The final touch was to add the new Ophelia Lipgloss.

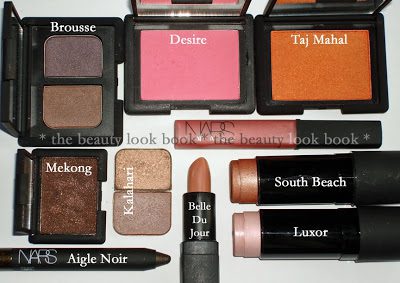
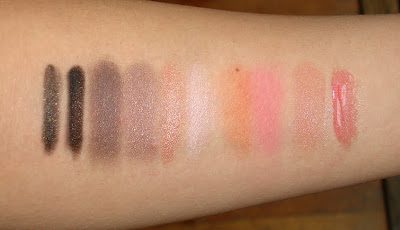
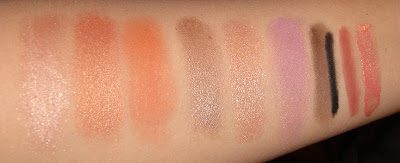
Swatches L to R: Aigle Noir Pencil, Mekong Eyeshadow Single, Brousse Duo (both sides mixed), Kalahari (both sides mixed), South Beach Multiple, Luxor Multiple, Taj Mahal Blush, Desire Blush, Belle du Jour Lipstick, Ophelia Lipgloss


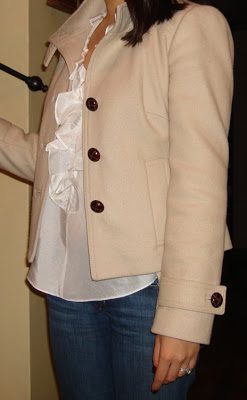
What I wore today to the makeover: White ruffle collared blouse from Banana Republic, Beige button coat from Banana Republic, Joes Jeans Petite Provocateur Fit.


Overall thoughts: I really loved the results and ended up purchasing the Eye Cream, Balancing Cleanser, Taj Mahal Blush, Ophelia Lipgloss and both mascaras. The EFA cream was a bit heavy for my skin, but from past makeover experiences I’ve had with NARS, I’ve found most of their moisturizers a bit too moisturizing for my skin, so it wasn’t surprising.

The number of products she used seemed like a lot, but the result was so pretty, I don’t think I’ll mind using everything again on numerous occasions in the future.

I absolutely LOVED both mascaras. They were both amazing and it was an instant lash-makeover with the application of both combined together. I’m not sure about the smudge-factor since it was raining heavily outside and my under-eye area was very moist from the EFA cream. I’ll be testing it out more in the next week and report back later about the results.

Most of the things I already owned from previous purchases. I’ve always been a HUGE fan of Nars and events like these are inspiring to me to try out new combinations to get me out of that same-look rut I tend to get into during this time of year.

It’s been a while since I’ve had a makeover – I used to go to Chanel and Nars events on a monthly basis before for ideas and GWPs. But there’s nothing like a horrible MAC makeover to make you want to stop going to any event period. That being said, I have ALWAYS had great makeover results with Nars events. I highly recommend you get on your local counters call lists or ask about upcoming events. They are super fun and you can get tons of ideas on how to combine different colors.

I find that a makeover is more successful when you have a certain look you have in mind so the makeup artists has an idea of what you’re looking for. Simply saying “give me a natural look” isn’t much help, so I suggest being a bit more specific like say, “I like pink lips” or “can you show me how to use Brousse Eyeshadow Duo?” If you simply have no idea, that’s fine too – just give them something to work with. Something like saying, “I wear champagnes and browns on my eyes with peach lips all the time – I need something different” can help a ton.

Uncategorized

Nars Makeover Event: Sugarland Duo Eyeshadow Duo + Luster Blush

June 7, 2009

This NARS makeover was done at a Bloomingdales event by one of the National Artists, but unfortunately I do not remember his name! I told him about a few items from Nars that I love (like the Luster Blush and Maldives Multiple) and he then picked out some new items to compliment what I already owned into a new fresh glowing look.

If you love neutrals, but are looking for something a bit different than your regular champagnes or beigey colors, this is a gorgeous look to try out. I’ll include descriptions of each product according to the Nars Website.

FACE:
* Oil Free Foundation in Budapest (equivalent to Chanel Teint Innocence Beige 2.0/MAC NC35/Armani LSF 5.5 or 6)
* Concealer Stick in Custard
* Sparkling Pressed Powder in Machu Picchu (Eden pressed powder with gold shimmer, not pictured)

CHEEKS:
* Multiple Stick in Maldives on apples and temples to highlight (pink champagne with shimmer – although to me this is more of a golden champagne peachy shimmer with a hint of pink)
* Blushes in Luster (sheer golden apricot) mixed together with Gina (tangerine)
EYES:
* Cream Eyeshadow in Corfu as a base (shimmering taupe)
* Eyeshadow Duo in Sugarland mixed onto lids (sparkling apricot & gilded orchid pink)
* Eyeliner Pencil in Black Moon (dense black – the one swatched is MAC Smolder though)
* Eyeshadow Single in Bali on top of liner for a softer look, also used on brows (neutral taupe)

LIPS:
* Lipliner pencil in Papua (cinnamon – this is a great neutral)
* Lipgloss in Orgasm (sheer warm pink with golden shimmer – but goes on a peachy gold)